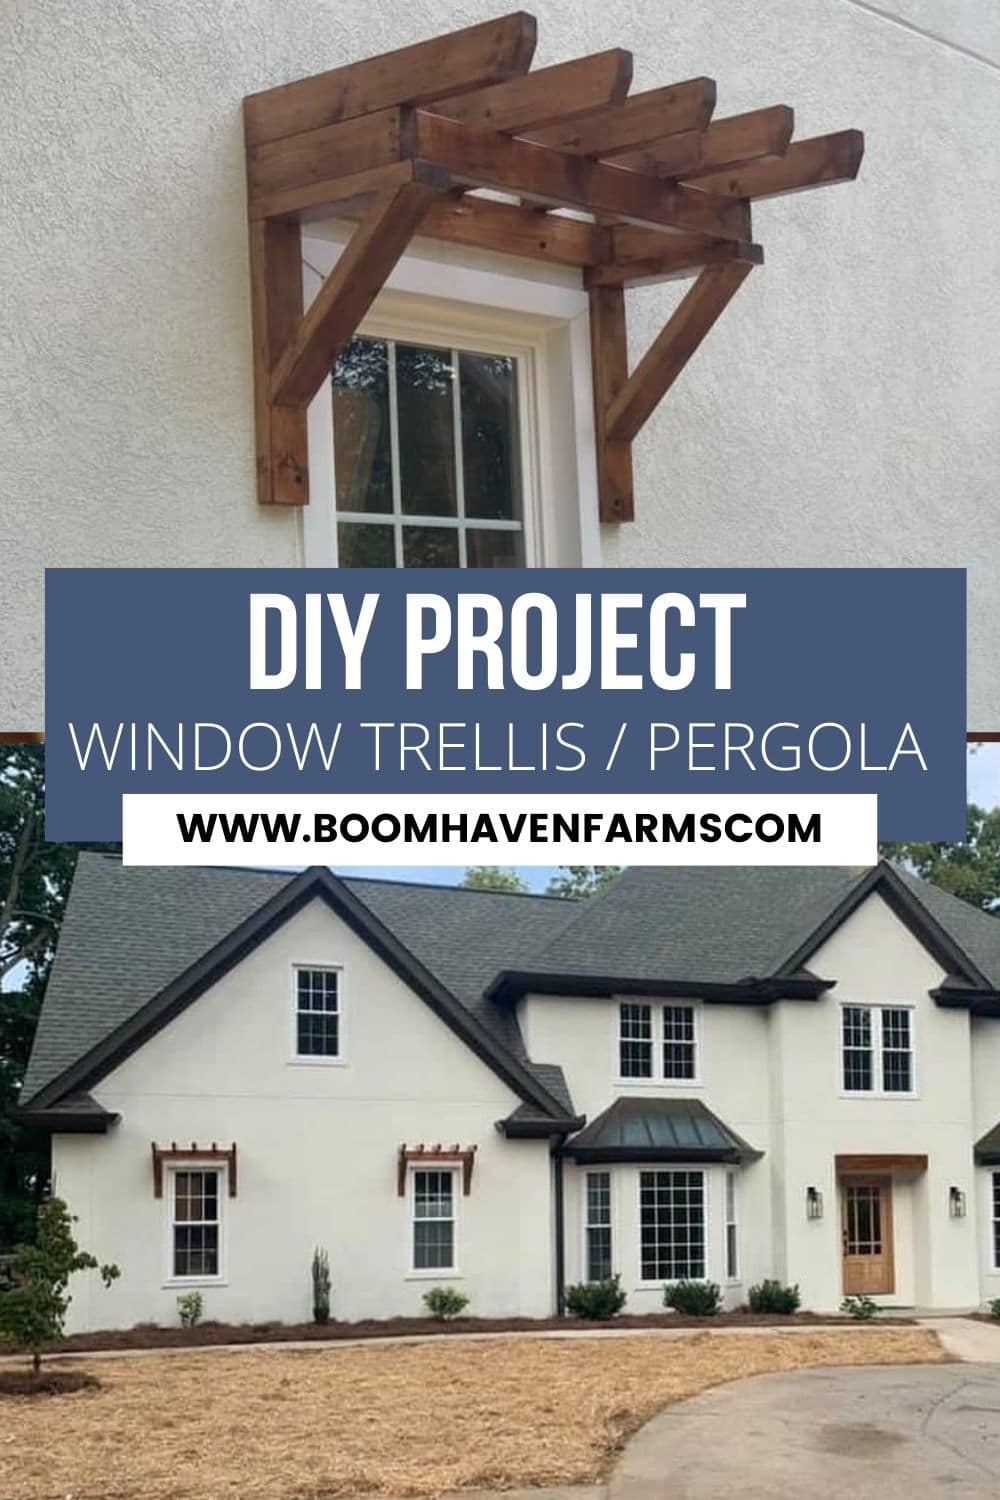
A window pergola can be an inviting addition to an exterior remodel or home renovation. A window trellis can be built on a budget with some basic materials in as little as a half-day. In this DIY post, you’ll find a materials and tools list as well as step-by-step instructions on how to build an inexpensive window trellis and other window pergola ideas.
Window pergola ideas: Learn about window pergola plans
We have been renovating our house since early 2021. We hired a designer to get professional advice to modernize the exterior and add visual interest to the front of our home. She suggested adding stained pergolas over the garage windows and a new front door with a stained beam above it. If you aren’t familiar, a window pergola is a wooden, composite, or aluminum structure built to go over a window or door as a decorative addition or give shade from direct sunlight.
Since I enjoy DIY projects, I was ready for the challenge of designing and building the window pergolas to accent the garage windows. I love tackling projects and teaching others the simplest way to complete a project effectively. Keep in mind; I am not a licensed contractor. These are the steps I followed to build and mount the window pergolas on my home. This is a DIY project.
Tip: Before beginning home projects or improvements, make sure to check with your HOA and local building codes to follow proper protocol.
Check out our exterior renovation project – Remodeling: Update Stucco Exterior Before and After
Other Names for Window Pergolas
- Window Trellis– Typically, when you hear trellis, you think more of a free-standing structure that creates shade and has plants, flowers, or vines growing up the structure. However, here we are, focusing on a trellis structure attached to your home or garage on your patio, above windows, exterior doors, decks, or garage doors.
- Window Arbor – An arbor is similar to the window trellis described above. Like the window trellis or window pergola, the window arbor adds unique appeal and shade to an existing structure. Arbors may also have plants growing up and around them, adding a unique characteristic to your home.
What is the main purpose of a pergola or Window Arbor?
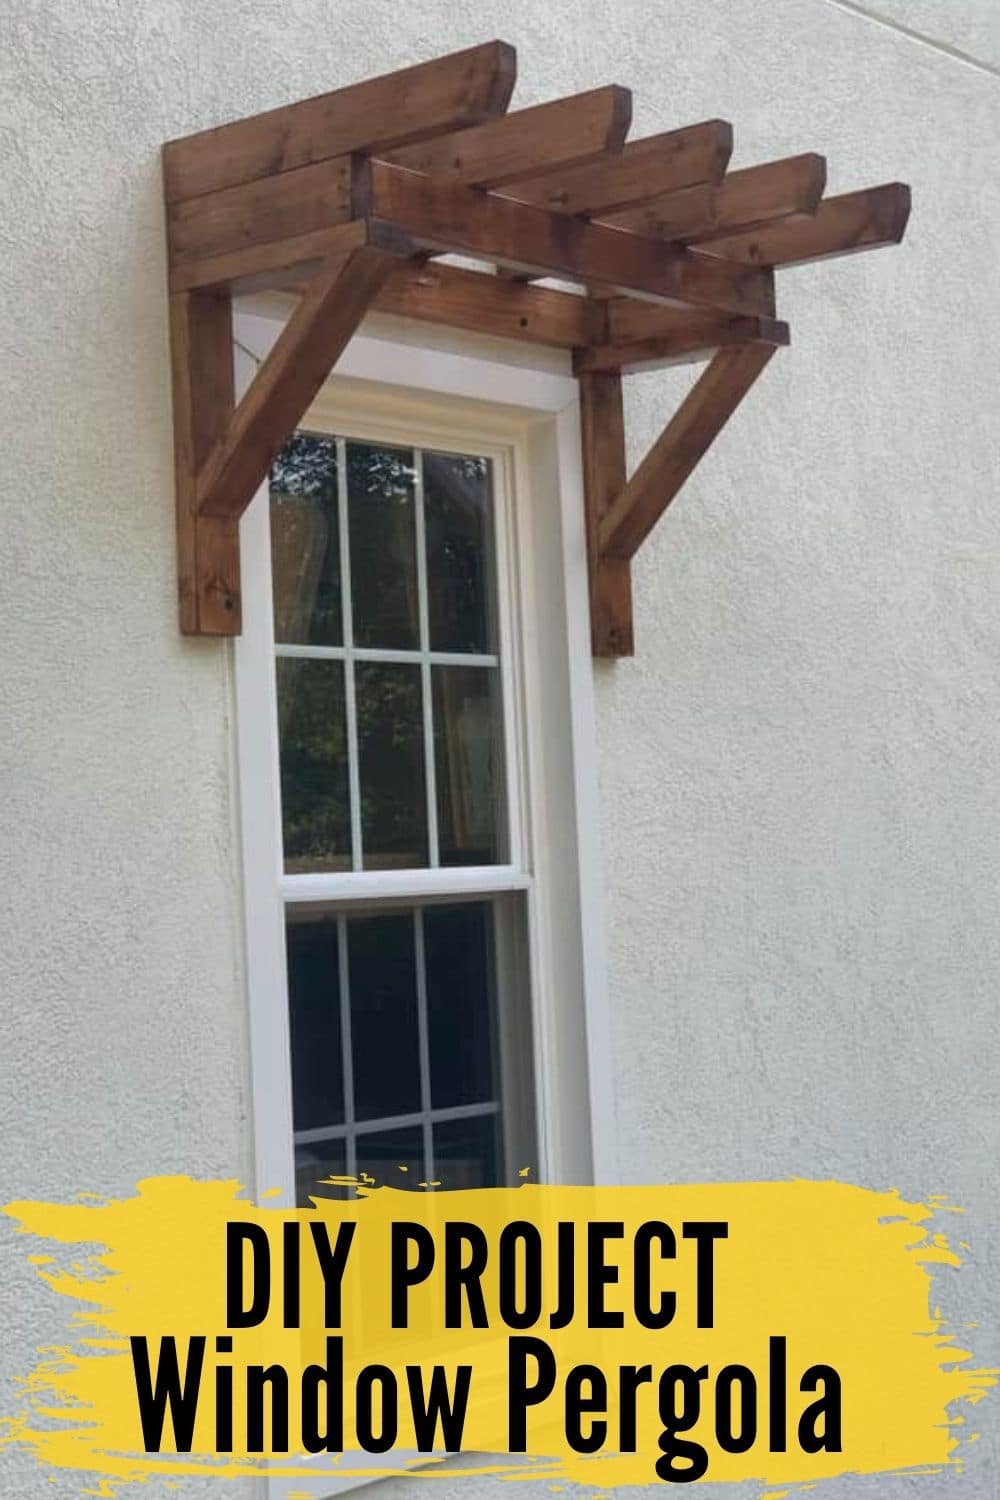
A window trellis may provide shade around the window, door, or garage door from direct sunlight, which may give relief from extreme temperatures. However, the main purpose of a pergola over a window, door, or garage is cosmetic. It is a styling element that can add dimension and visual interest to a home.
IS IT CHEAPER TO BUY OR BUILD A PERGOLA?
It will always be cheaper to build a window pergola than buy a kit. A pergola kit adds convenience with pre-cut lumber and hardware to attach the kit to the structure. In comparison, I built my window pergolas for approximately $45 each, while kits may range from mid $100’s up to $750.
Does a pergola Over WIndow add value to a home?
Any time you can add an elegant design to the exterior of your home, there will be an increase in value. Ultimately, a simple window trellis will add a unique design that will attract the eye of the buyer, therefore, creating more value for you.
How much does it cost to build your own pergola?
The cost of window arbors depends on several factors. How fancy or intricate would you like your trellis to be? What type of wood will you use? What is the size of the trellis unit? These factors can add cost to the pergolas. I spent roughly $45 for each of the pergolas. For this project, we wanted a simple design with clean lines.
Make sure to check out these pictures of Window Pergola Ideas for inspiration.
Is a Window Trellis easy to build?
This project was pretty straightforward. It took about half a day to design, assemble, stain, and hang in place.
Pergola Components
- Braces
- Frame
- Rafters / Top Slats
Materials You’ll Need
- Four – 2x4x8 (Possibly longer boards depending on the size of window, door, or patio) – You can use many different types of wood for window pergolas. The cheaper side is pine or spruce. Mid-grade is a termite-resistant cedar. Higher-end would be using a composite. A composite pergola would be termite-proof and upkeep-free. It may cost more on the front side, but the composite is worth it in the long run.
- Deck Screws – I used 3″ screws
- Exterior stain and polyurethane
- 150 grit Sandpaper
- Smaller lag bolts
- Wood putty – if you choose to drill pilot holes and countersink your deck screws
Tools you’ll need
- Miter or circular saw
- jigsaw
- drill with a drill bit and a screwdriver bit
- paintbrush
- Ladder
How to build a window pergola
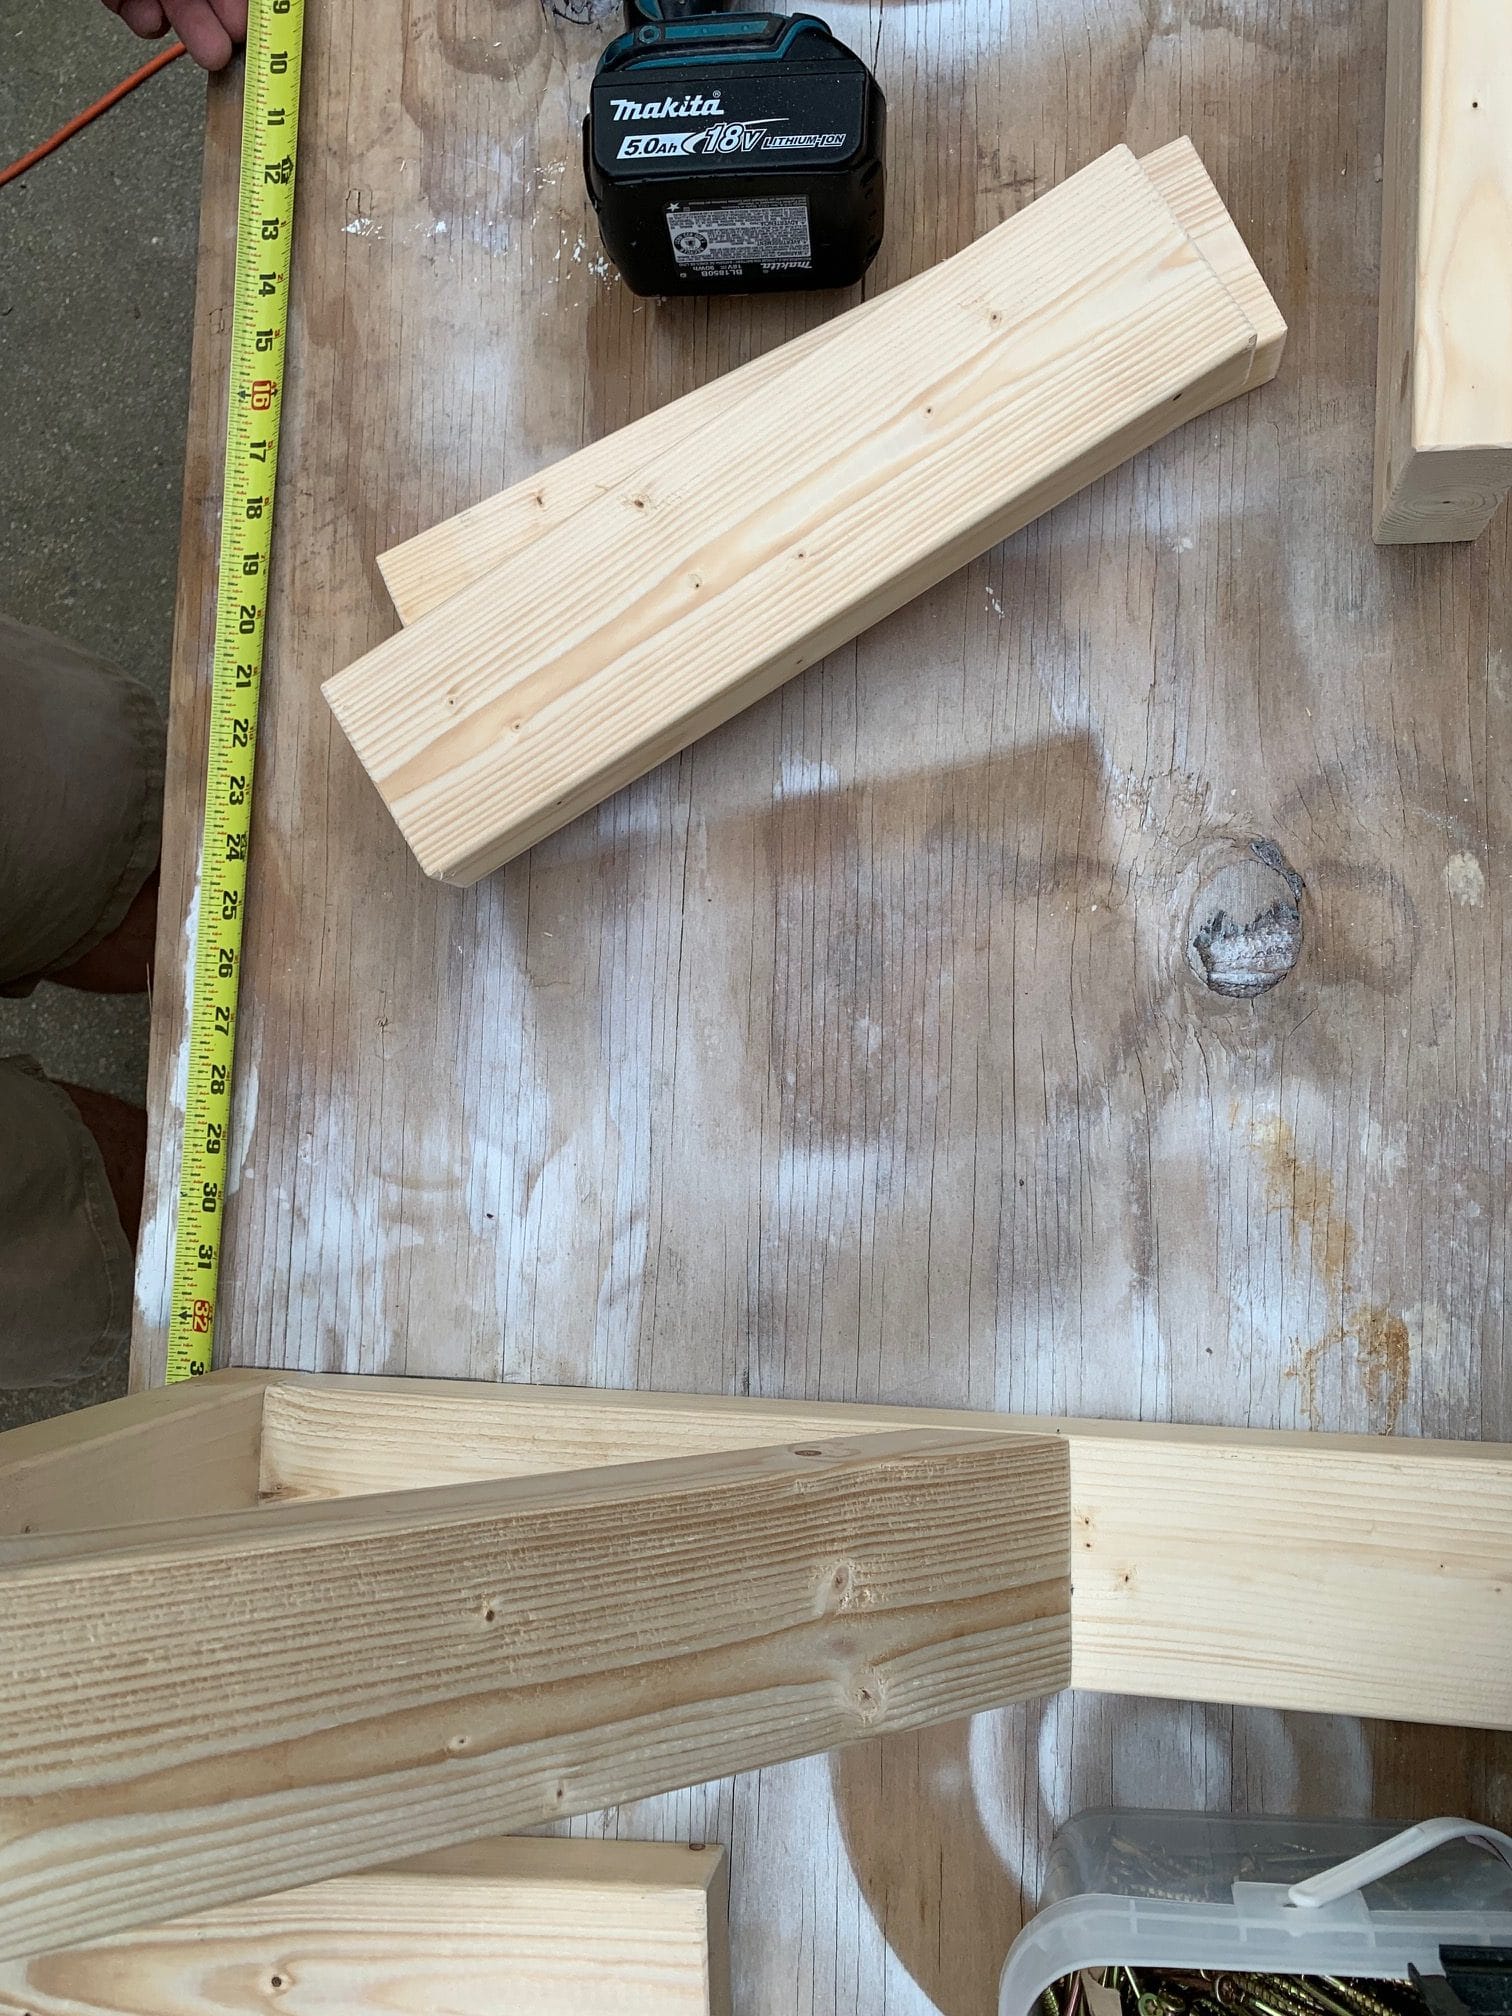
1. Determine the size of your pergola. I calculated the pergola’s height by starting at the bottom of my braces on each side of the window a little more than 1/4th of the way from the top of the window. You can go as much as 1/3rd, but I prefer the look closer to 1/4th. Measure from the starting point of your bottom brace to about an inch and a half lower than you want the bottom of the pergola frame to sit above the window or door. Next, measure the width of your window. You can also add a few inches to match the gap above the window. I measured right to the sides of the window trim for my width.
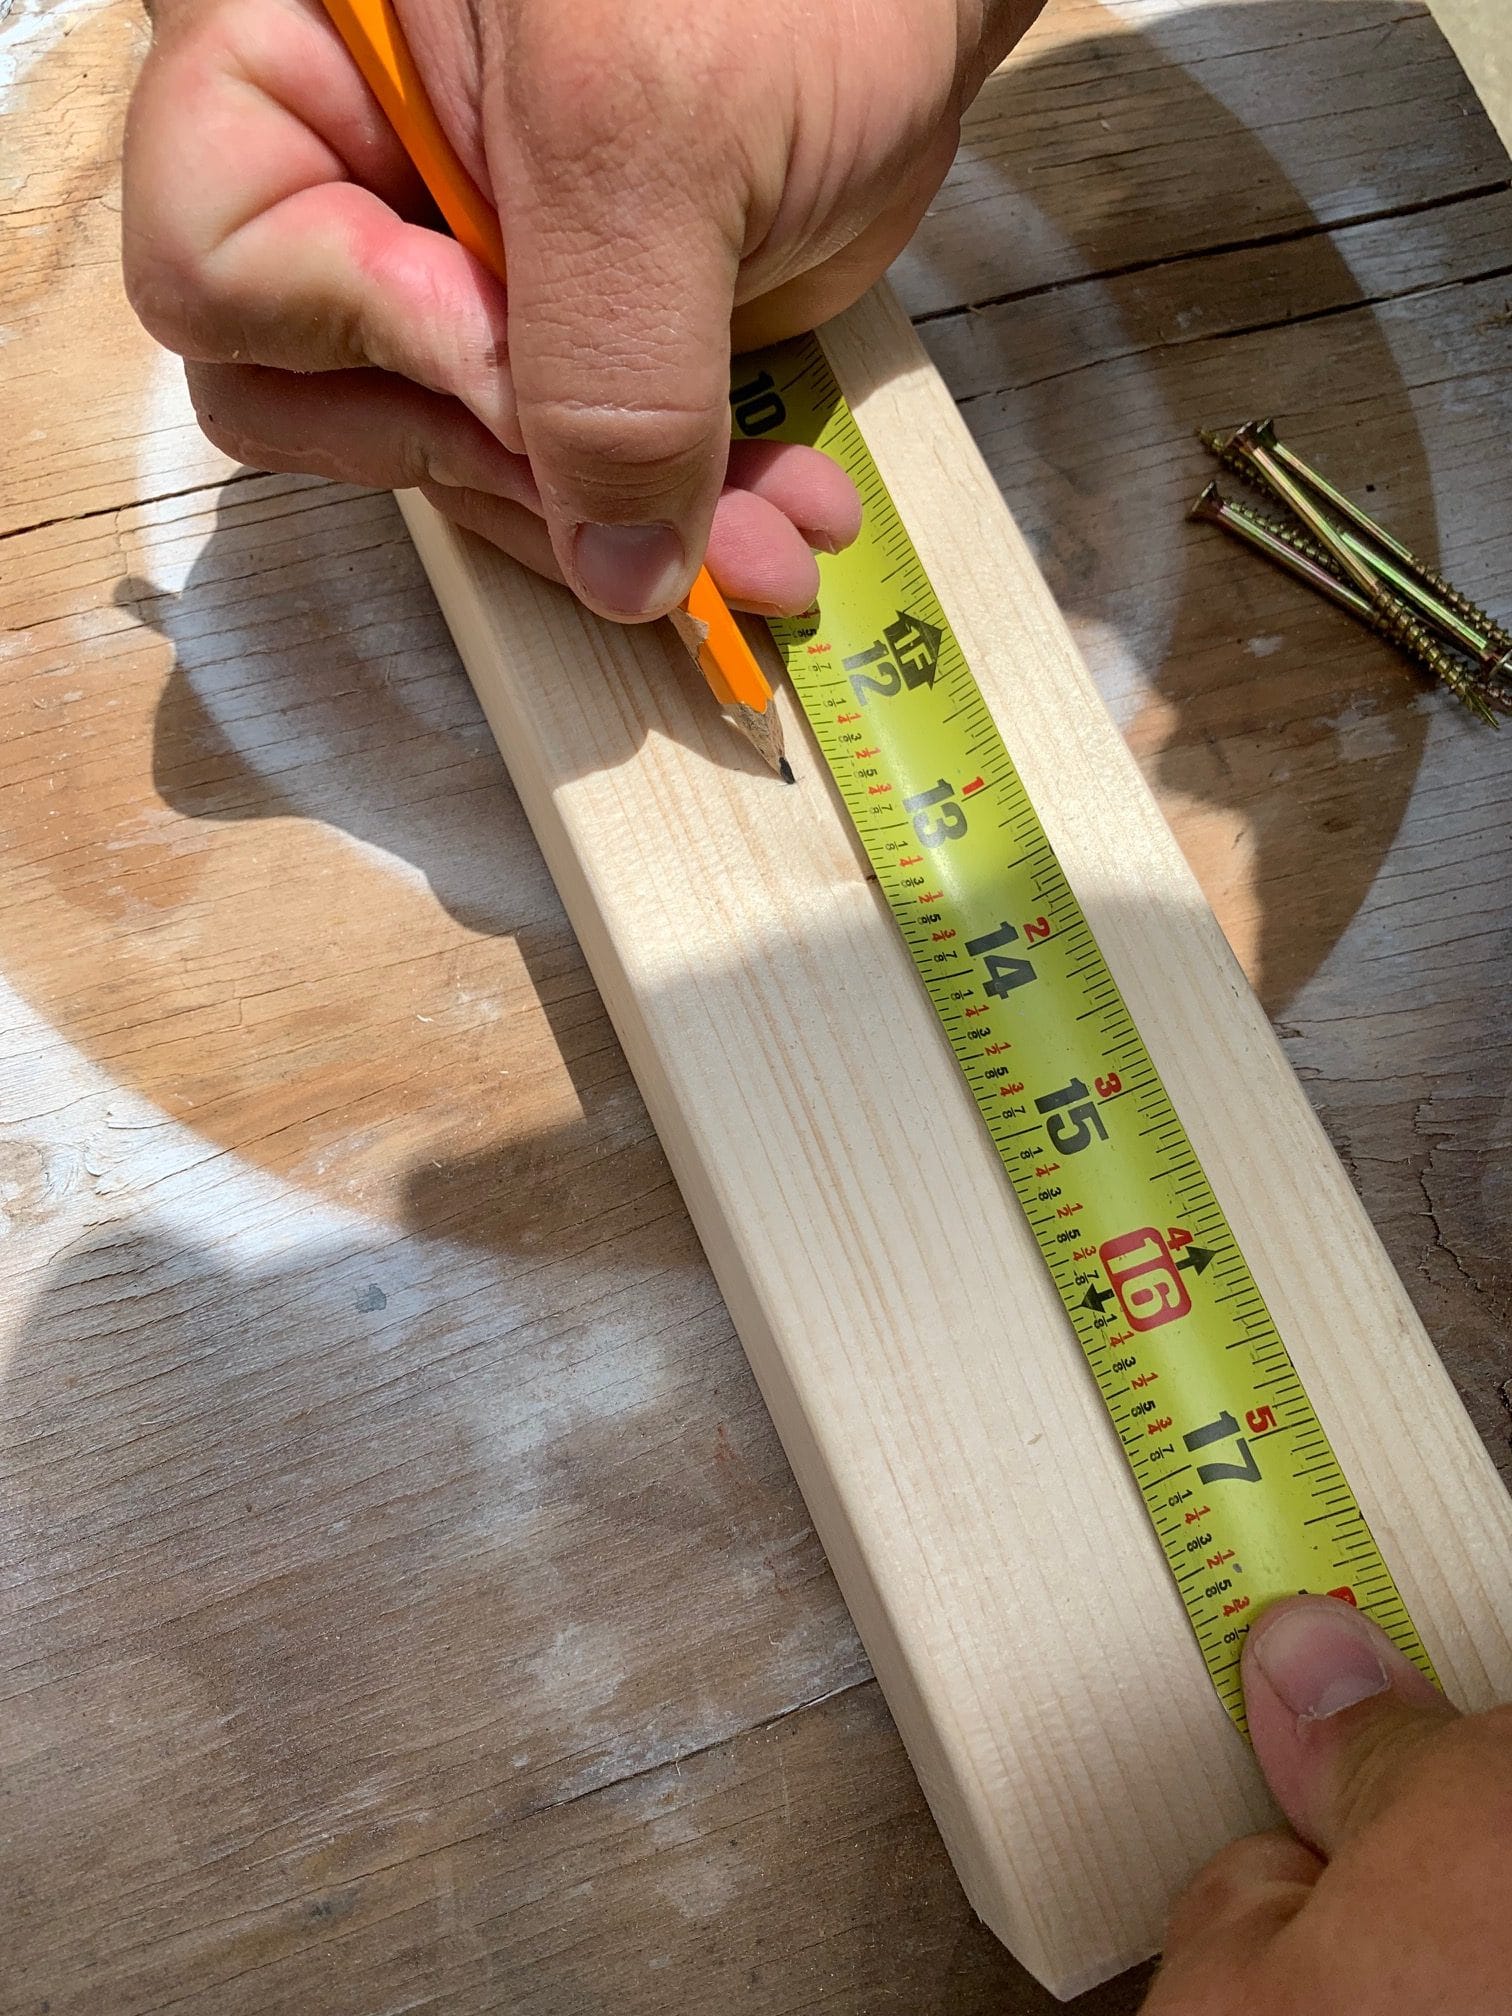
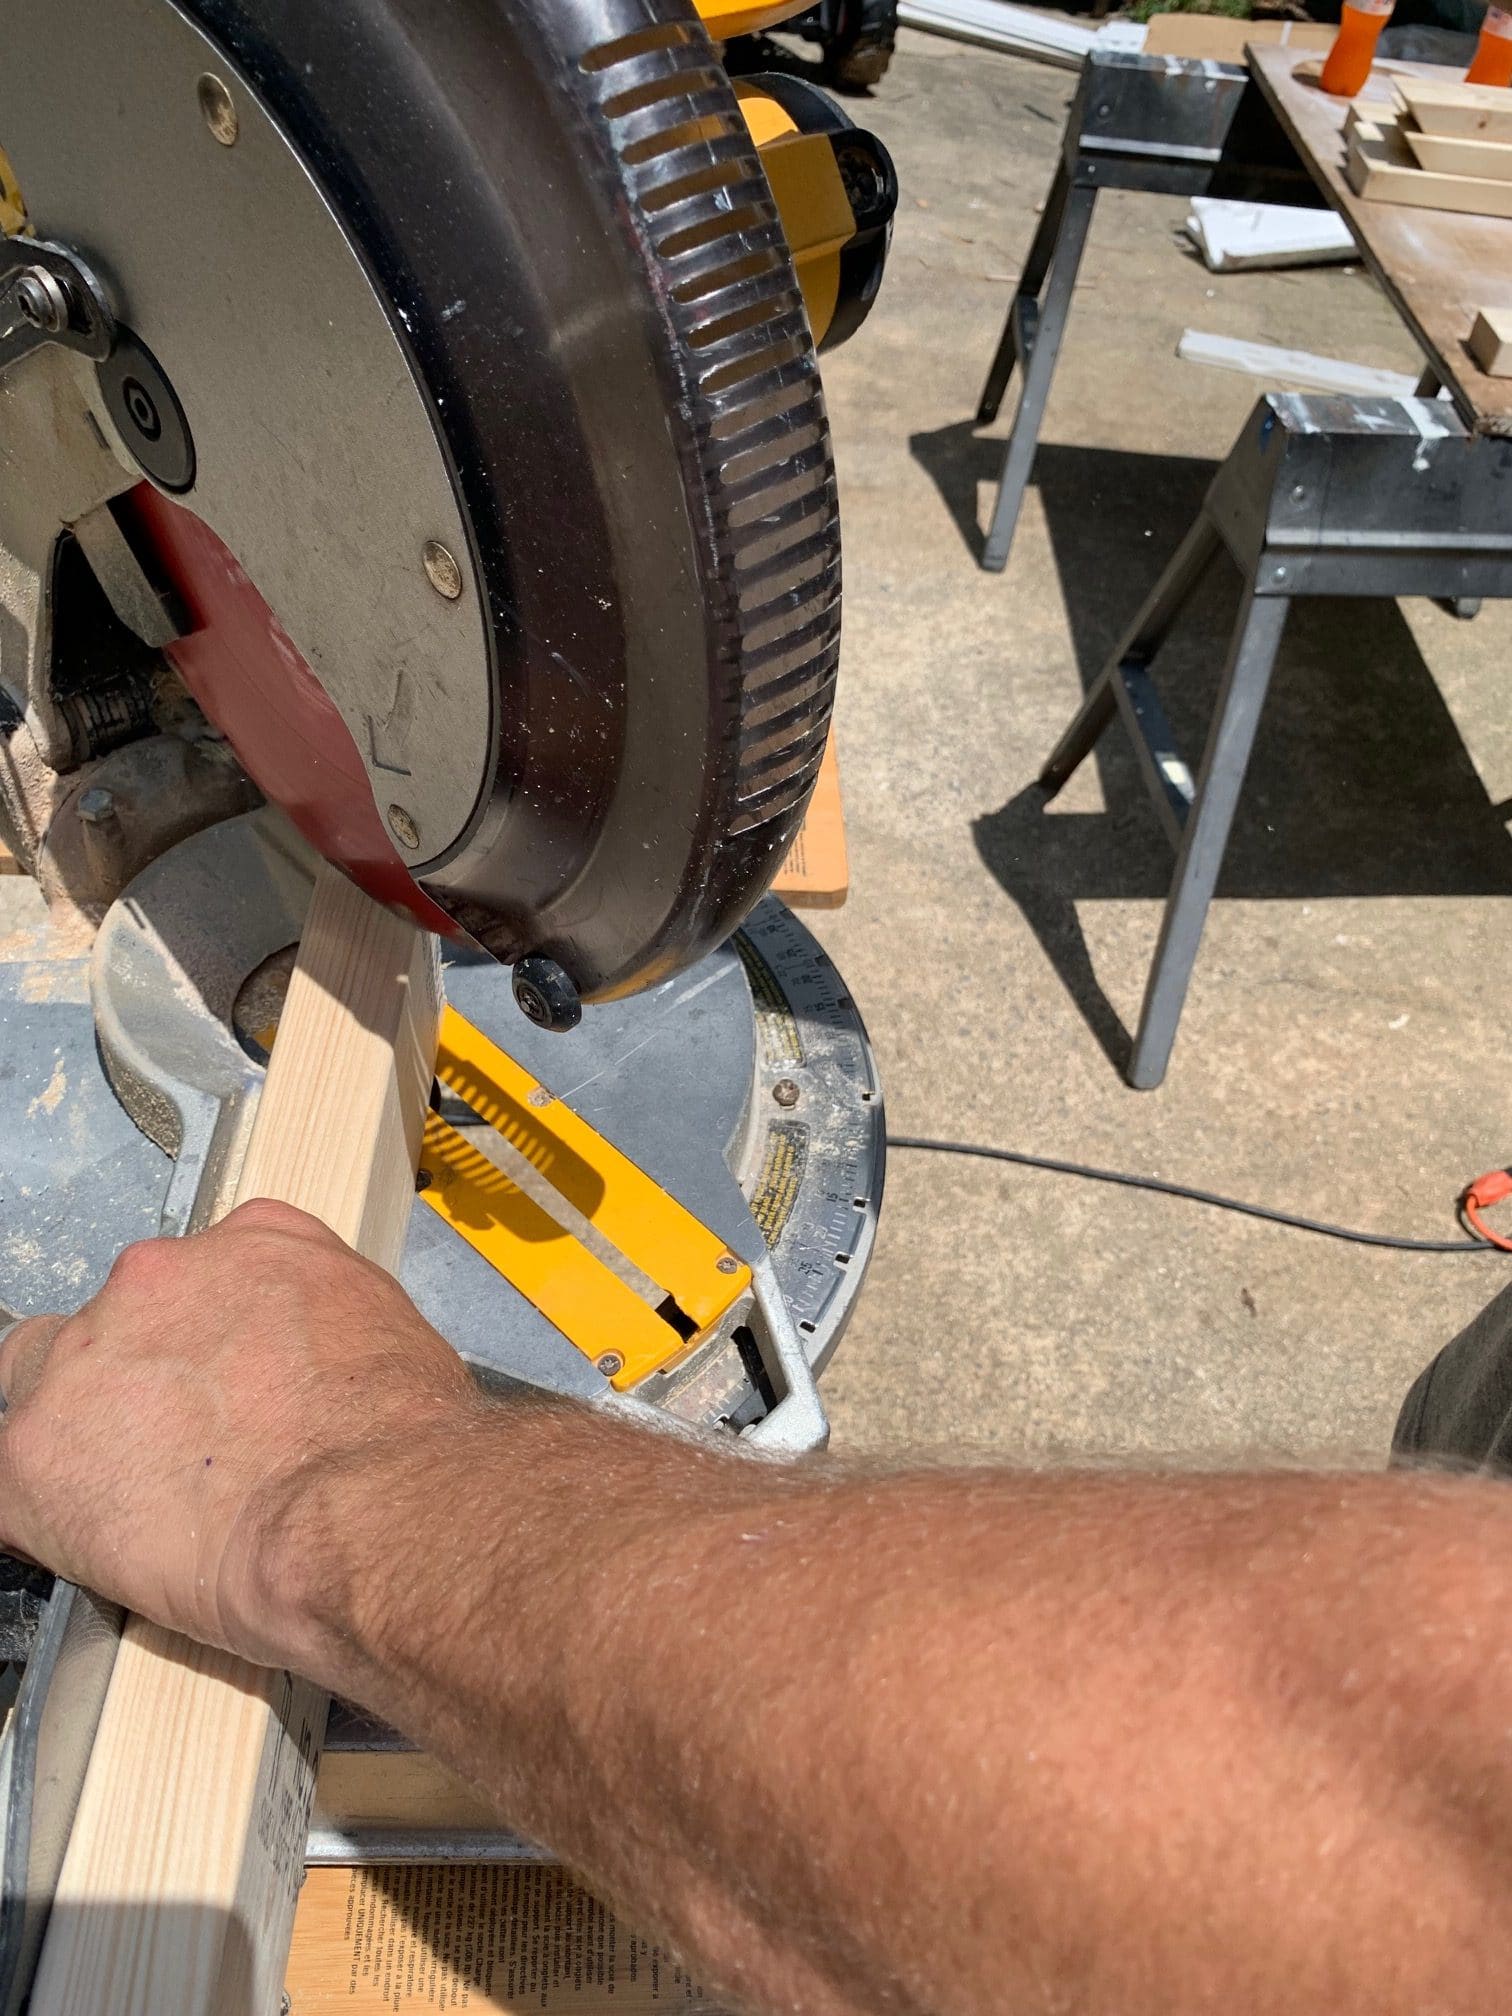
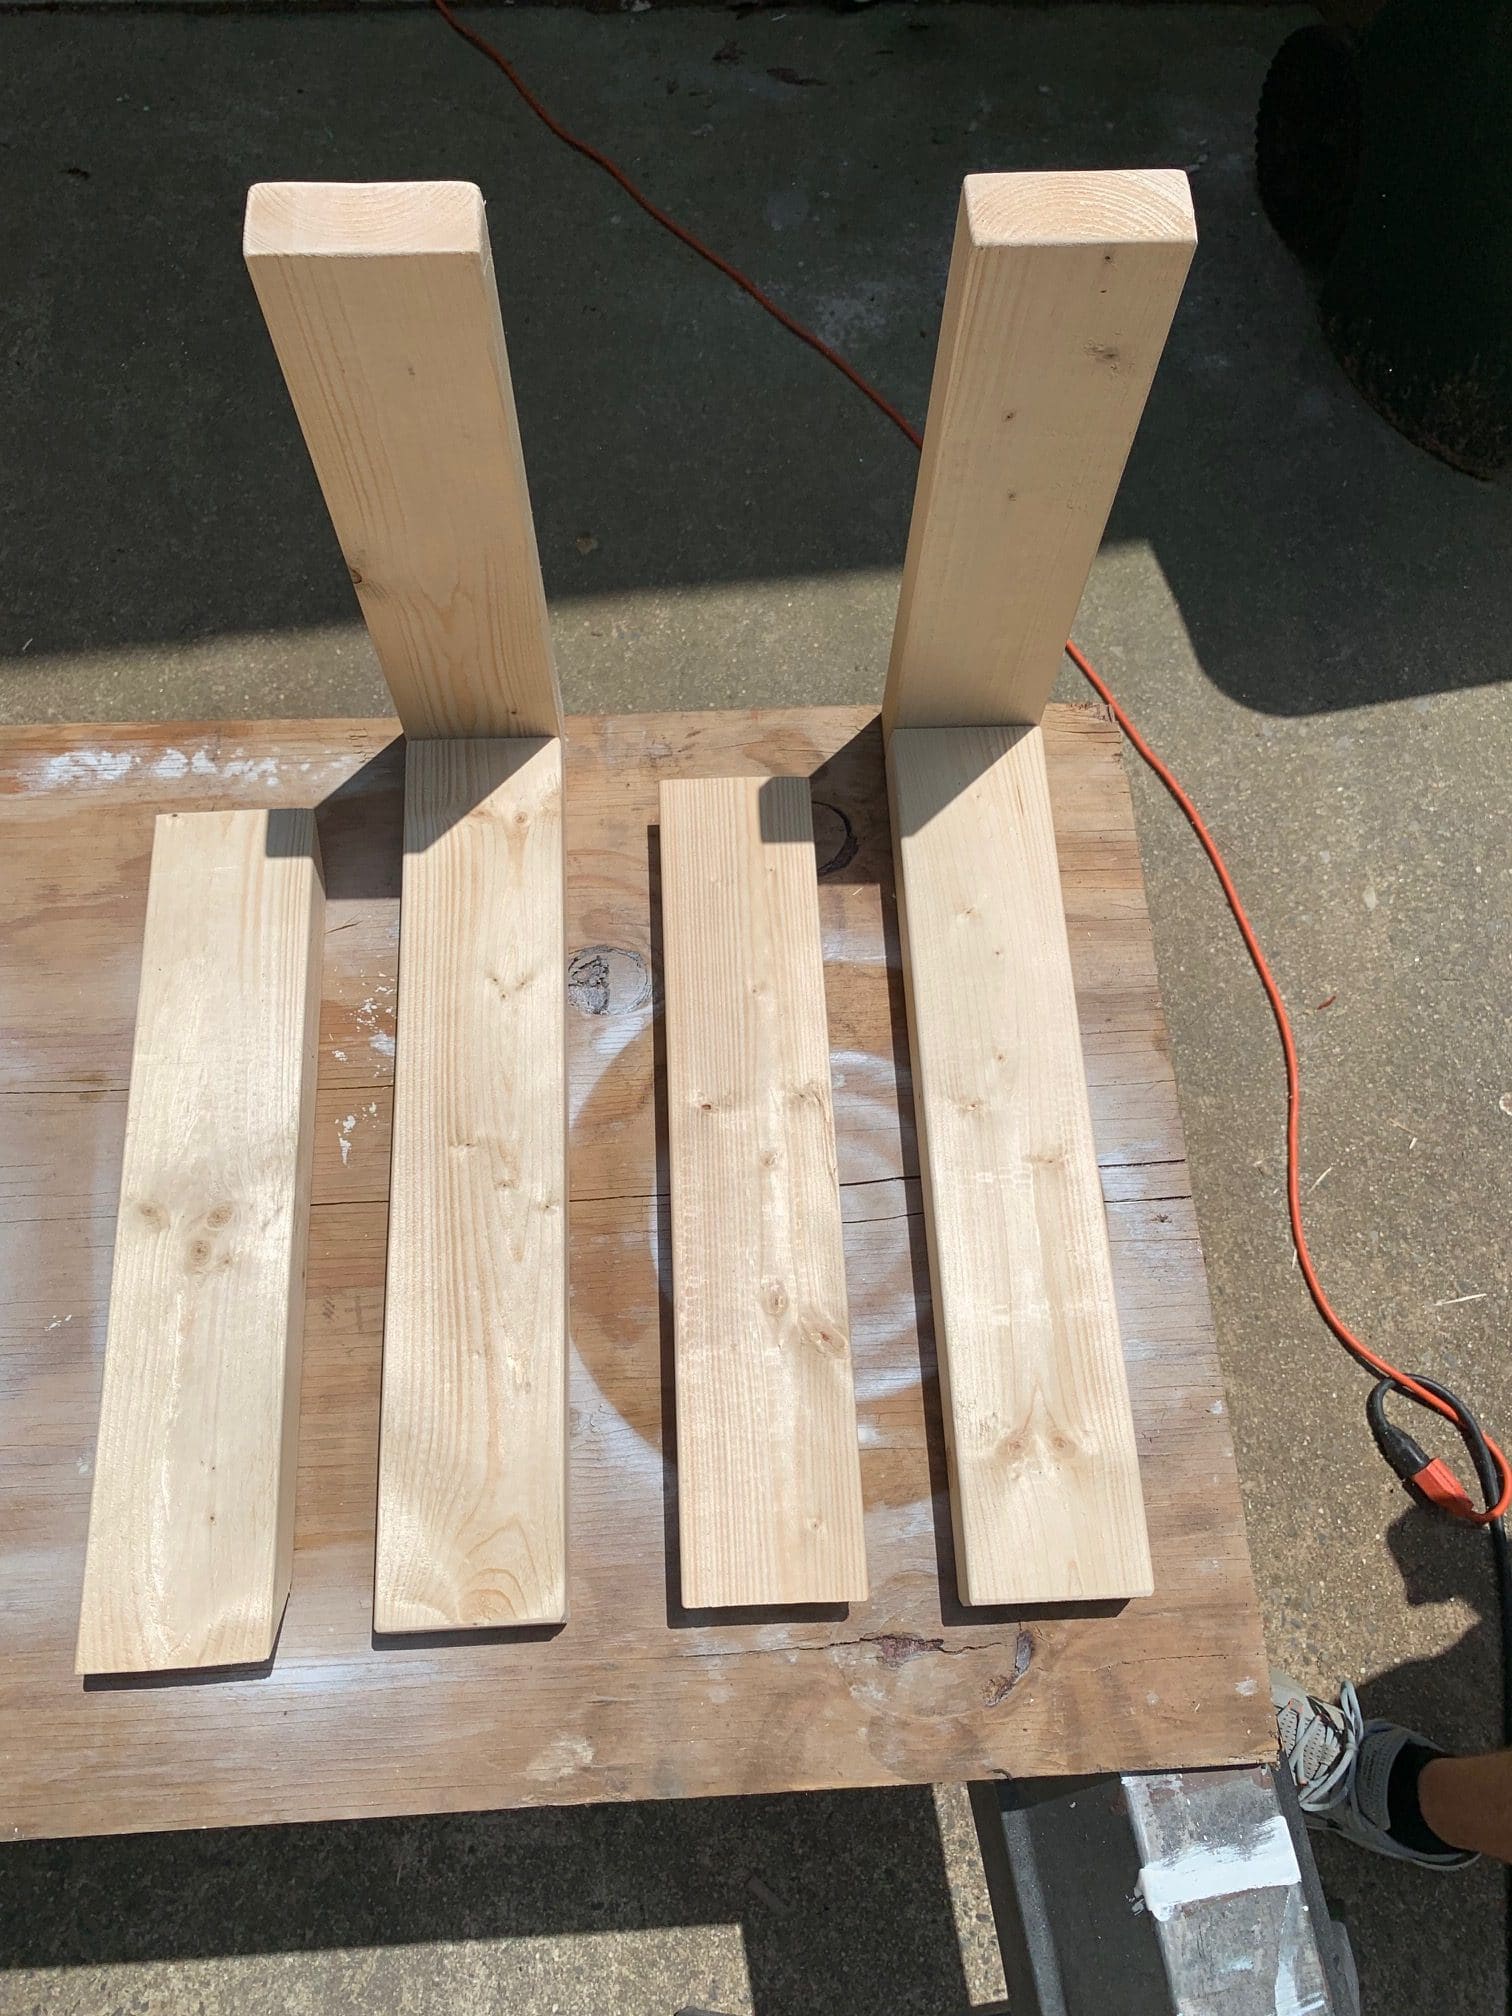
2. Now that you have the dimensions, we will build the support braces. Measure and cut the 2×4 to match the measurement you got for the height in step 1. You will cut two at a time, so all of your braces are cut before building. I cut four since I was building two separate window pergolas. These will be the back support braces.
3. You will need to determine the depth of the trellis. This comes down to a visual preference. I chose my braces to extend 15 inches away from the house. Remember, you will have rafters that go on top of the pergola structure, which will extend further for added dimension.
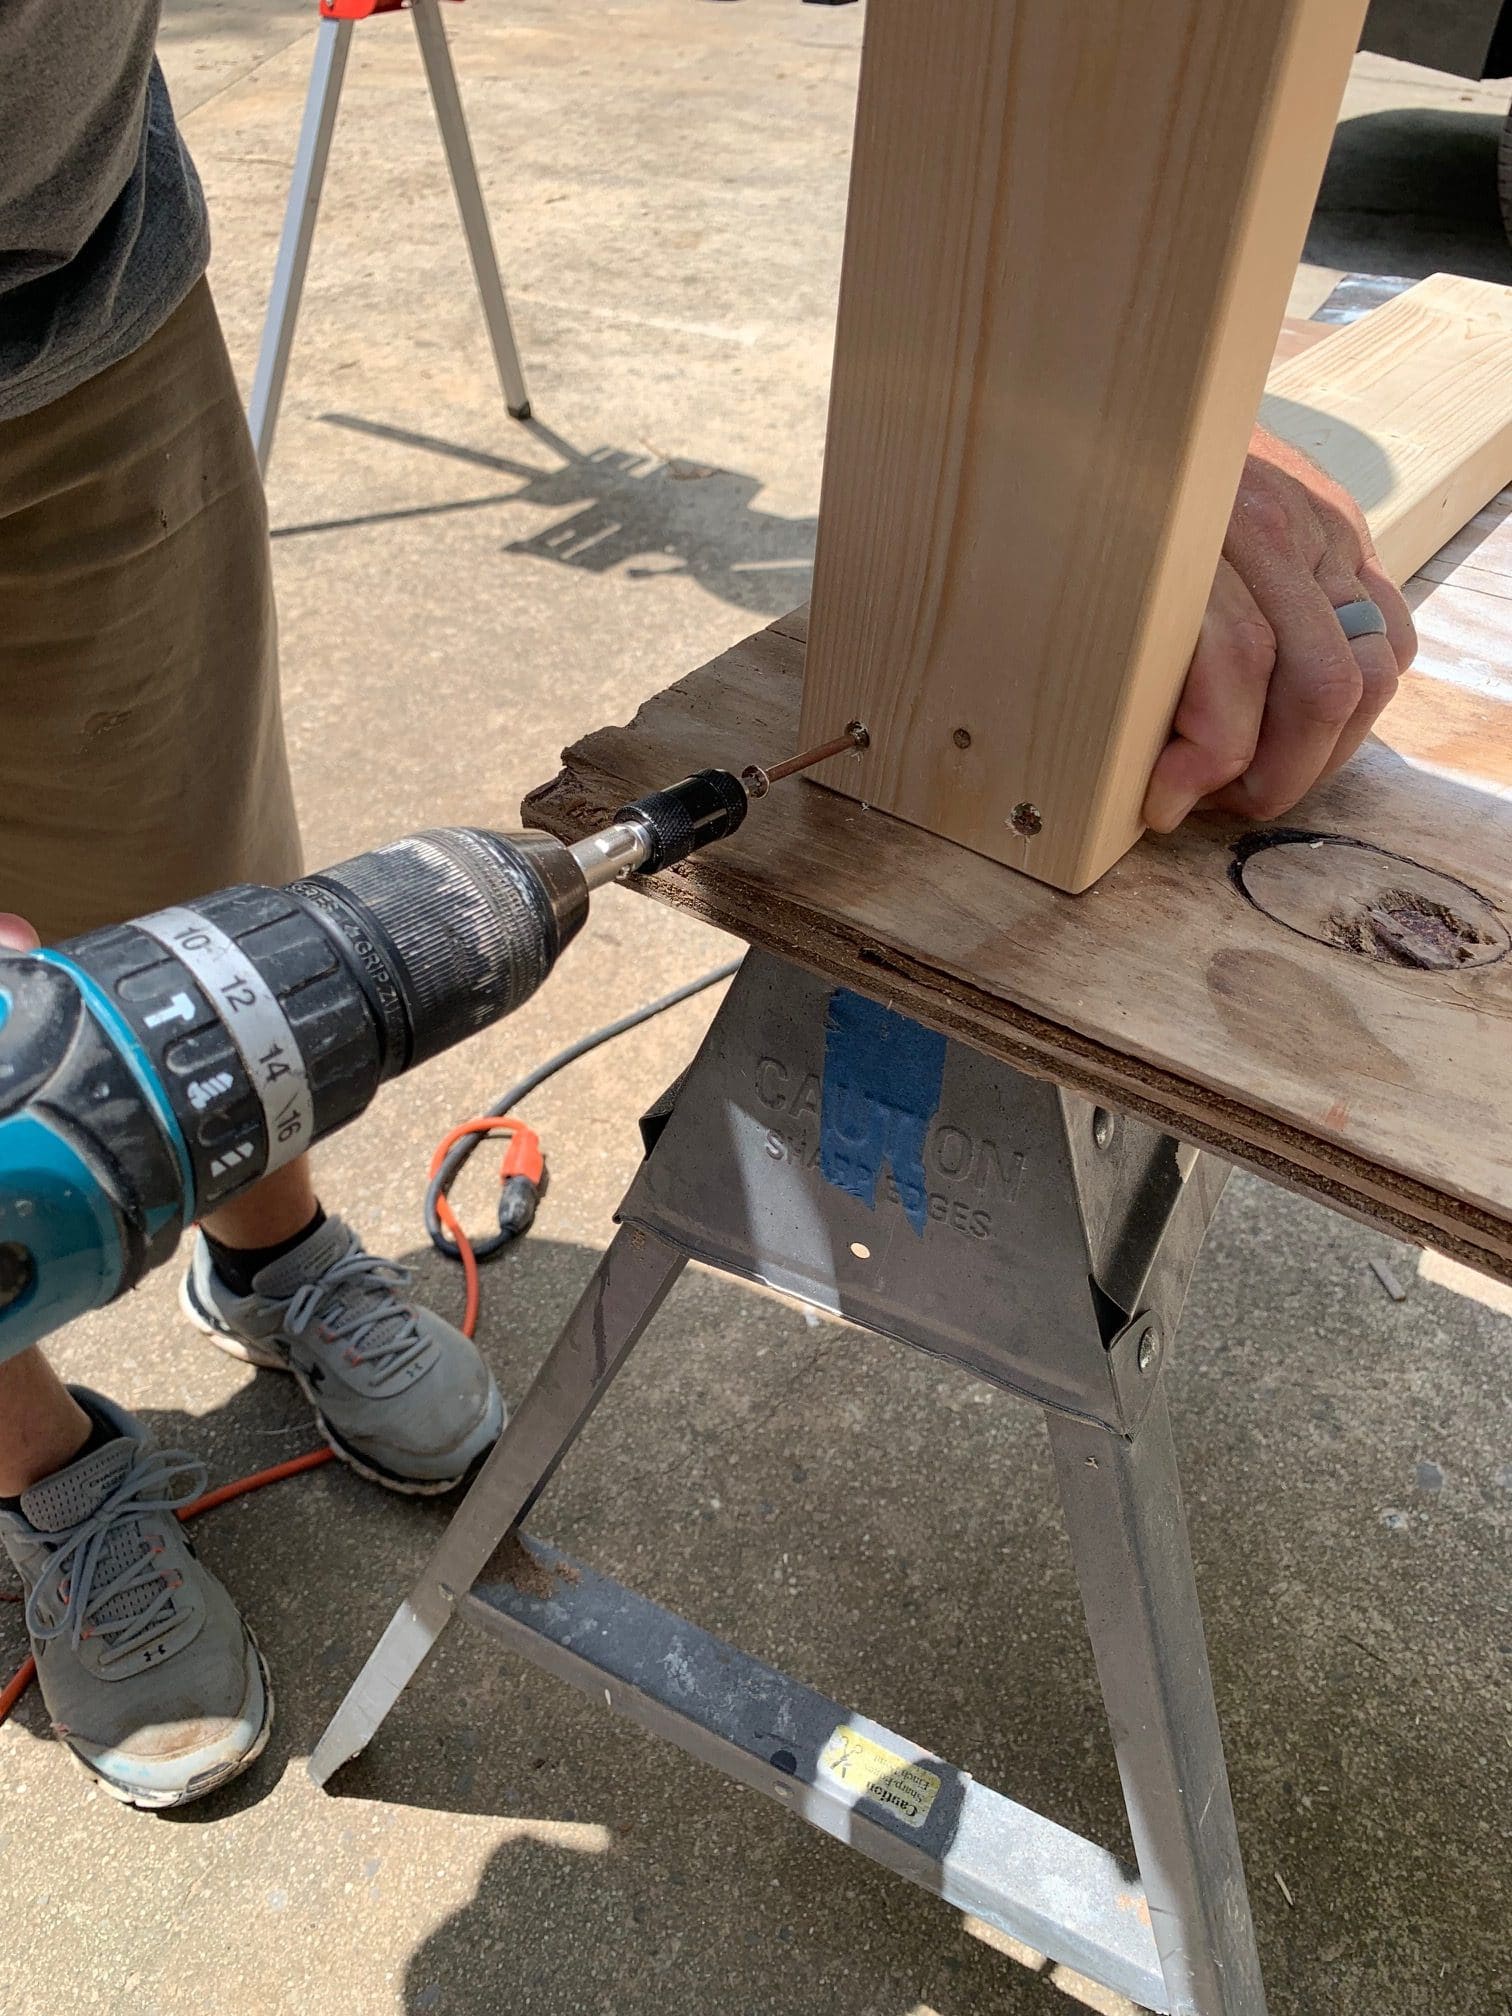
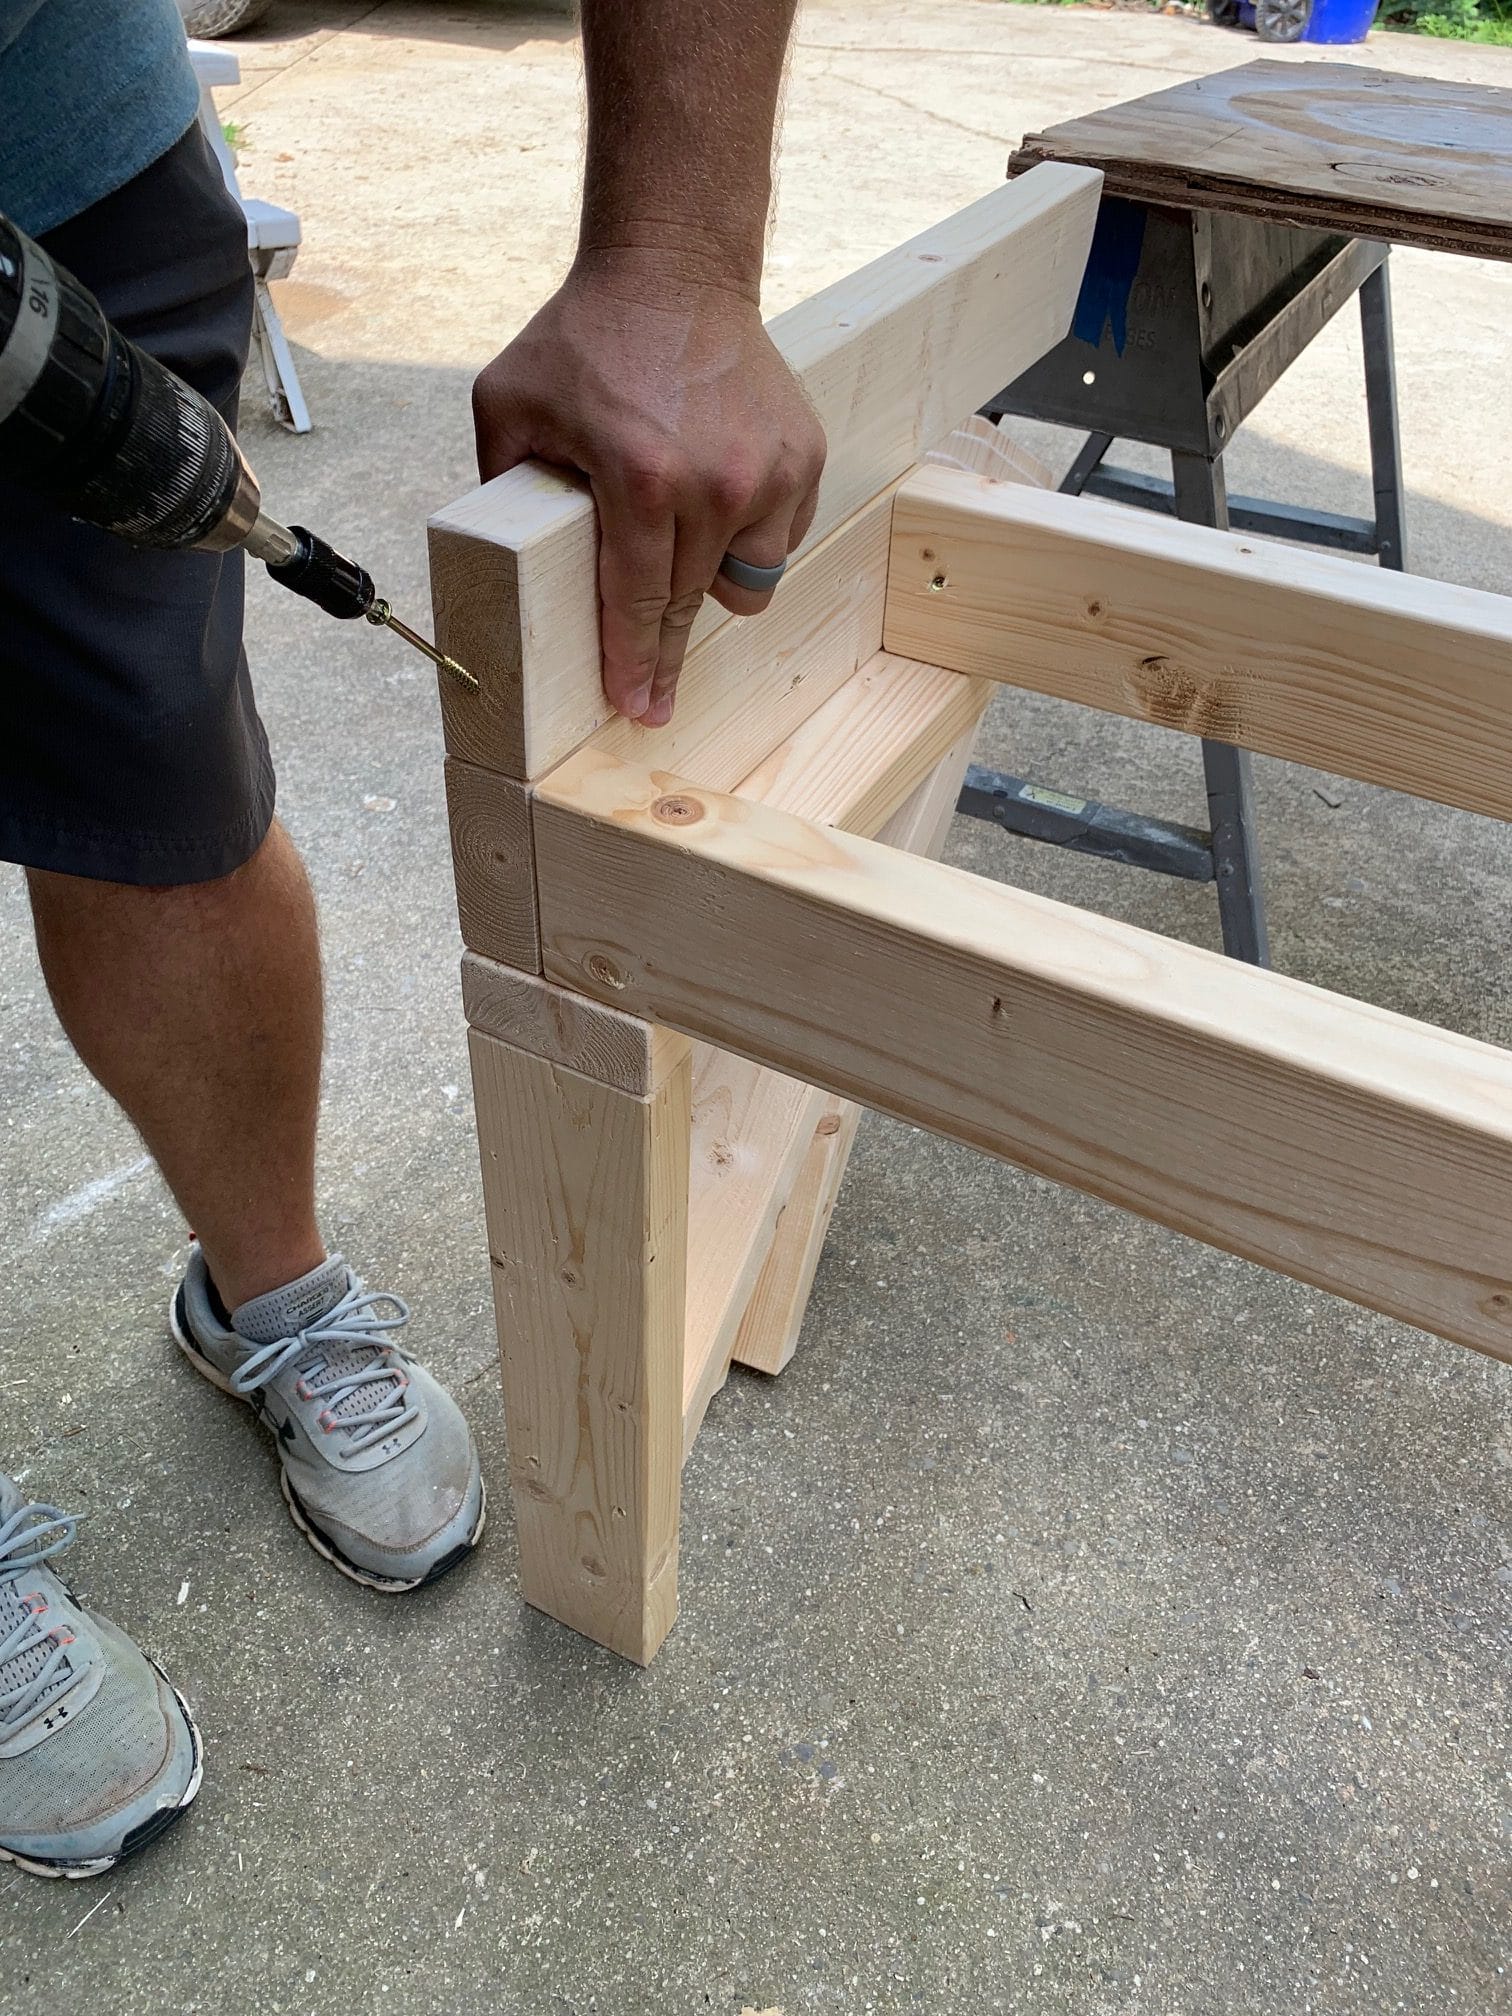
4. Cut the 2×4, which will be the top piece of the brace, to the measurement you determined in step 3. Lay the back brace down and stand the top brace up on its end to where the pieces are put together to look like an L. Use 3″ deck screws to attach the back and top braces together.
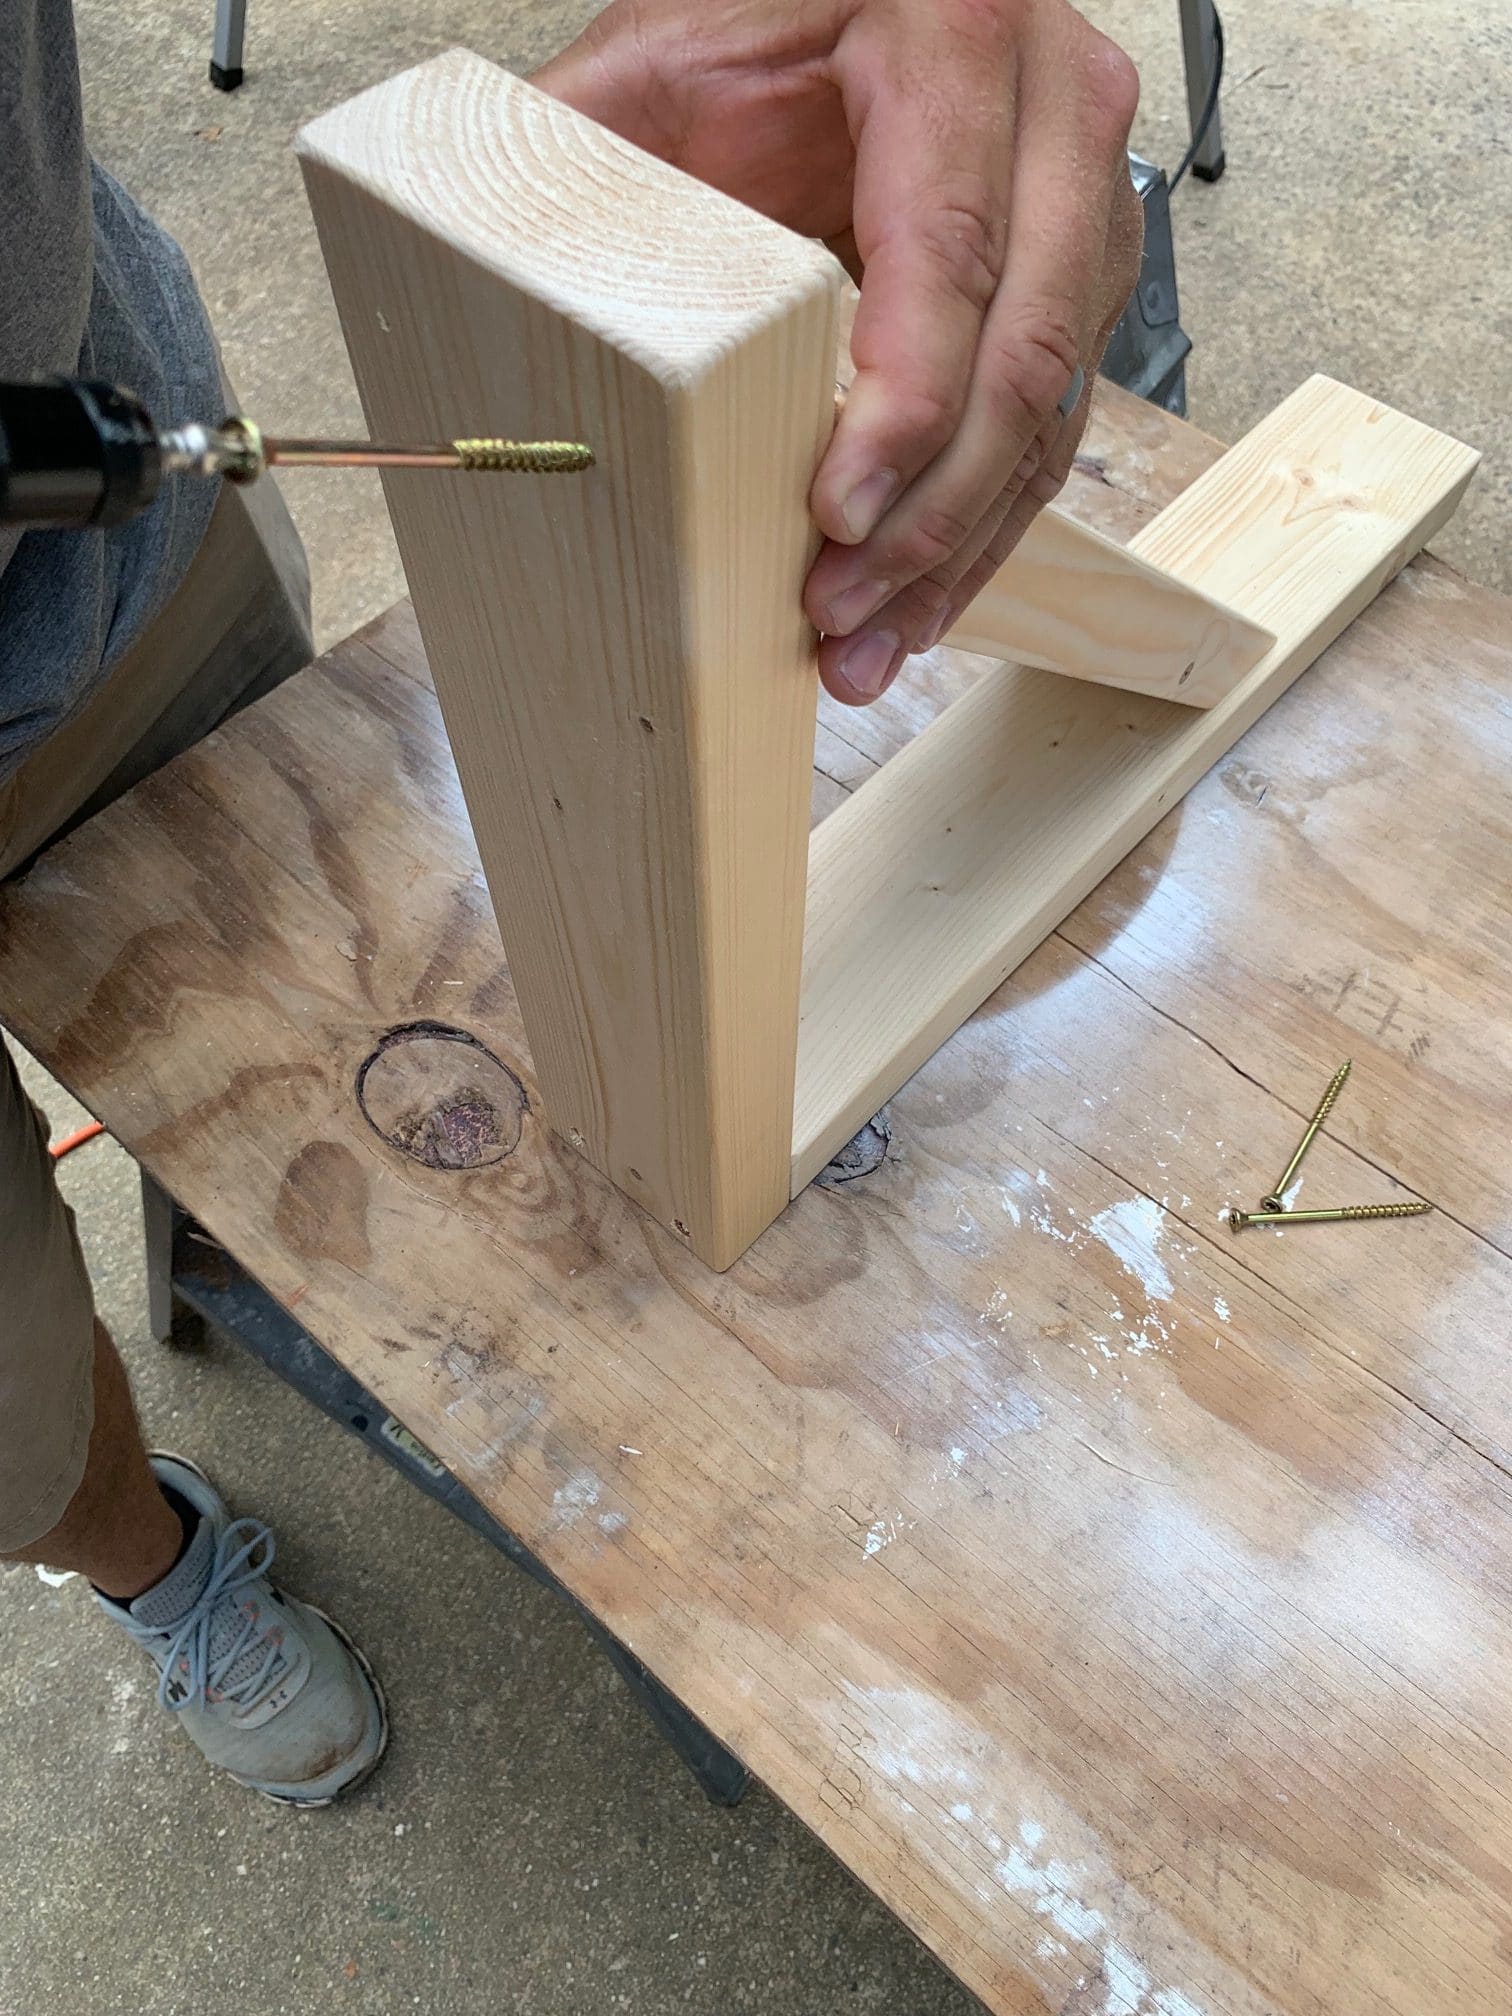
5. Next is determining the size of the diagonal rafter, which will create the completed brace. It should be an equal distance from the top and the bottom of the back brace. These will be degree cuts instead of 90-degree cuts. Cut both ends of the diagonal brace at 45-degrees. Attach with deck screws. Your braces should now be complete and look like a very basic corbel.
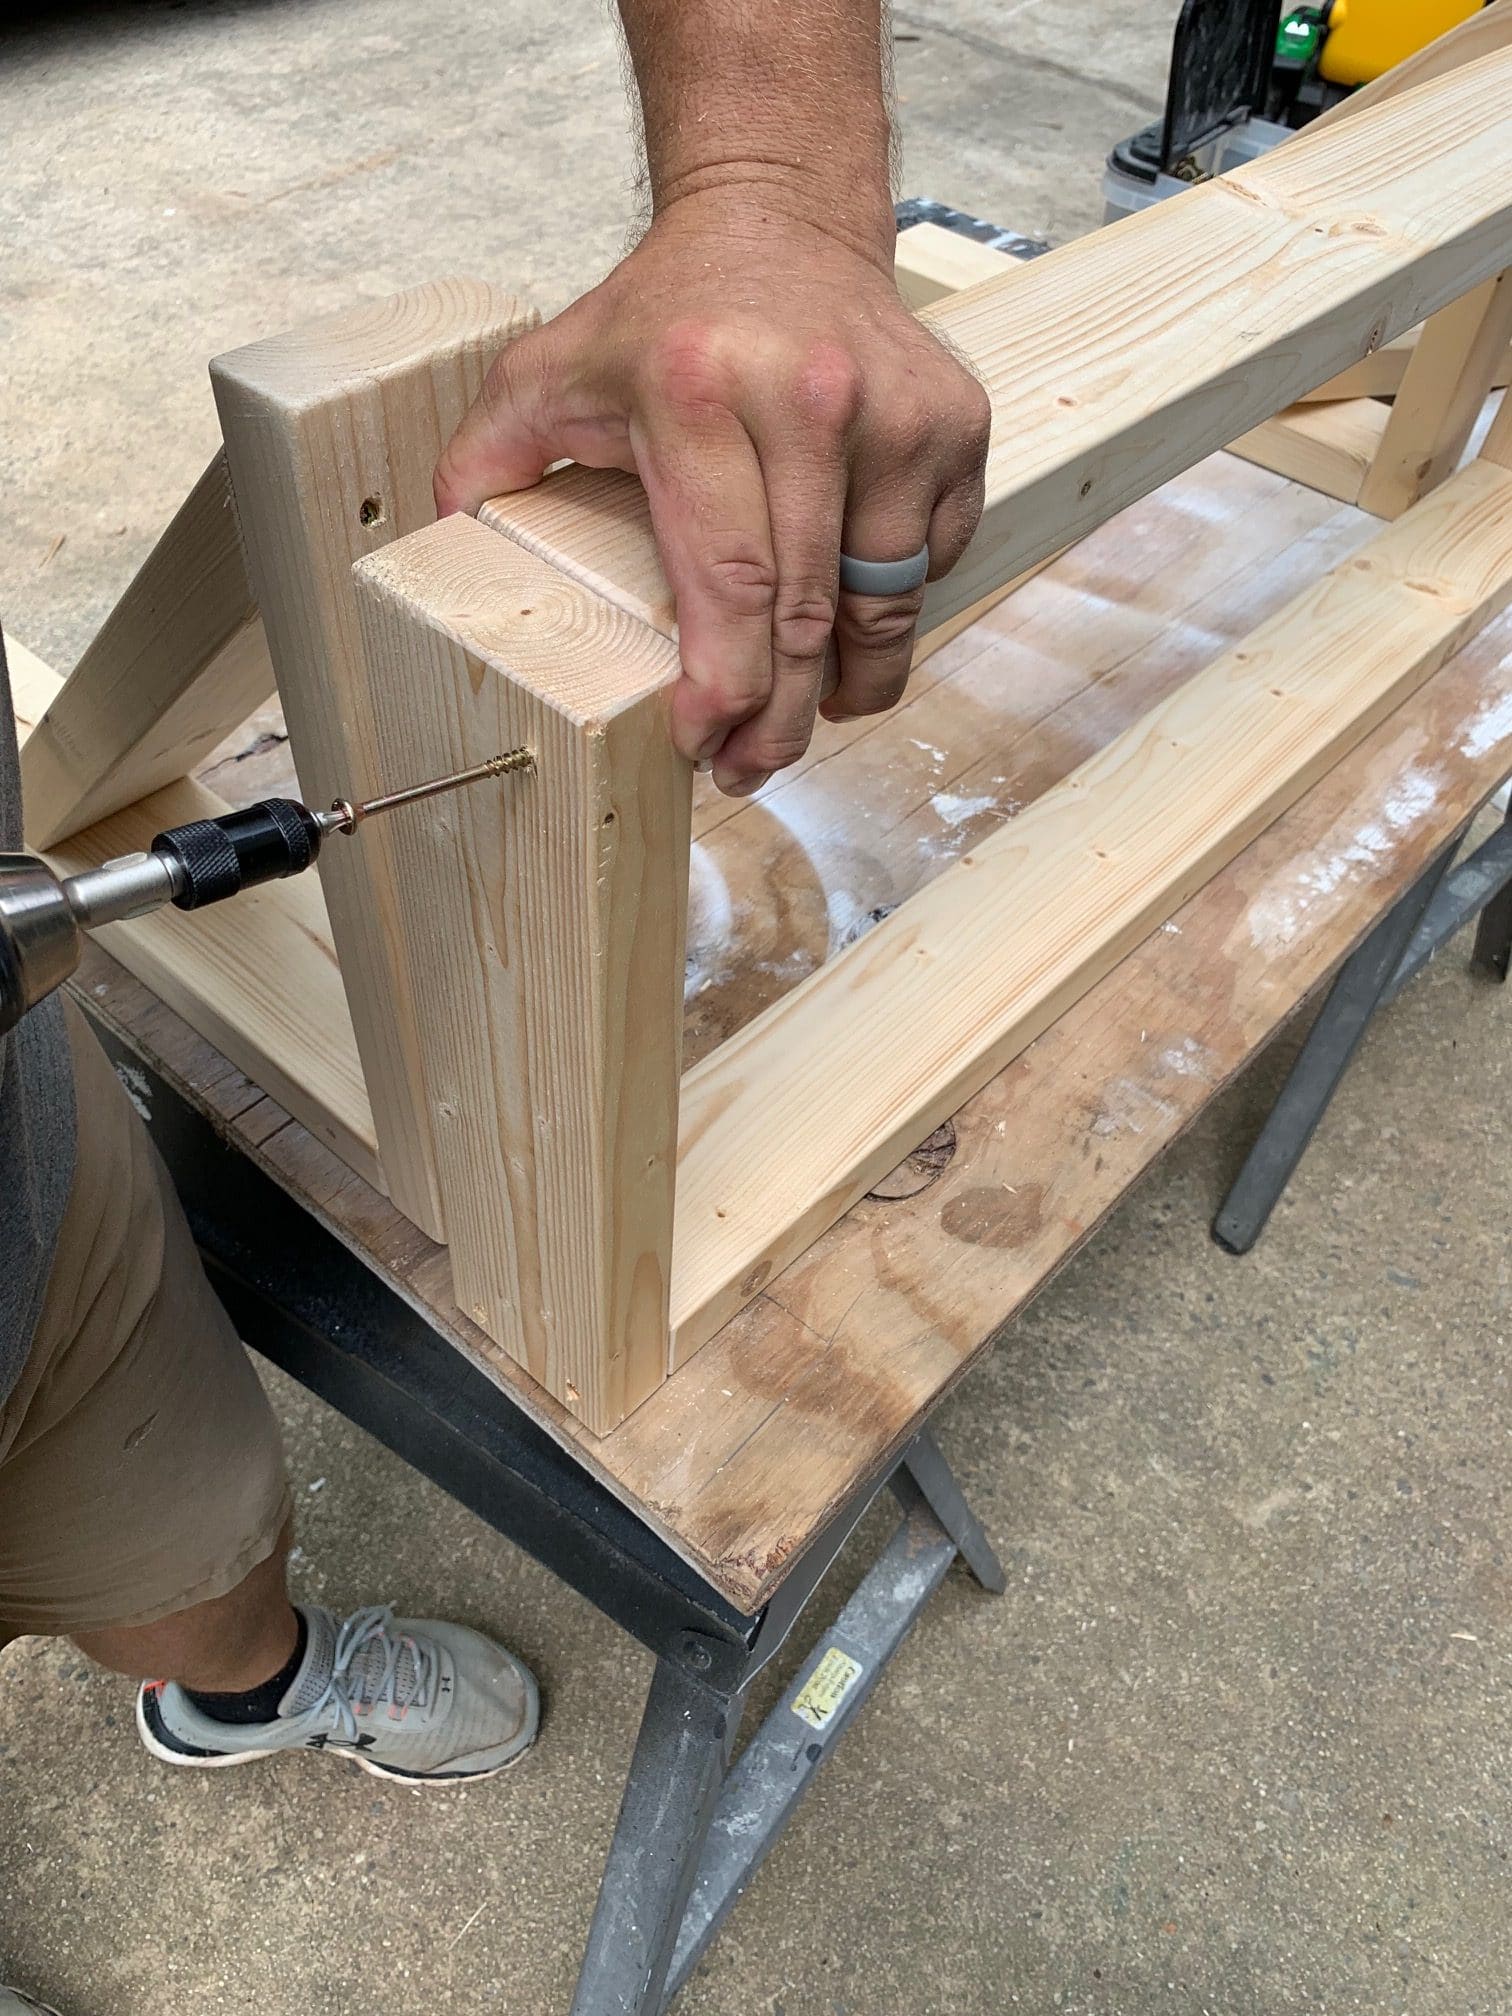
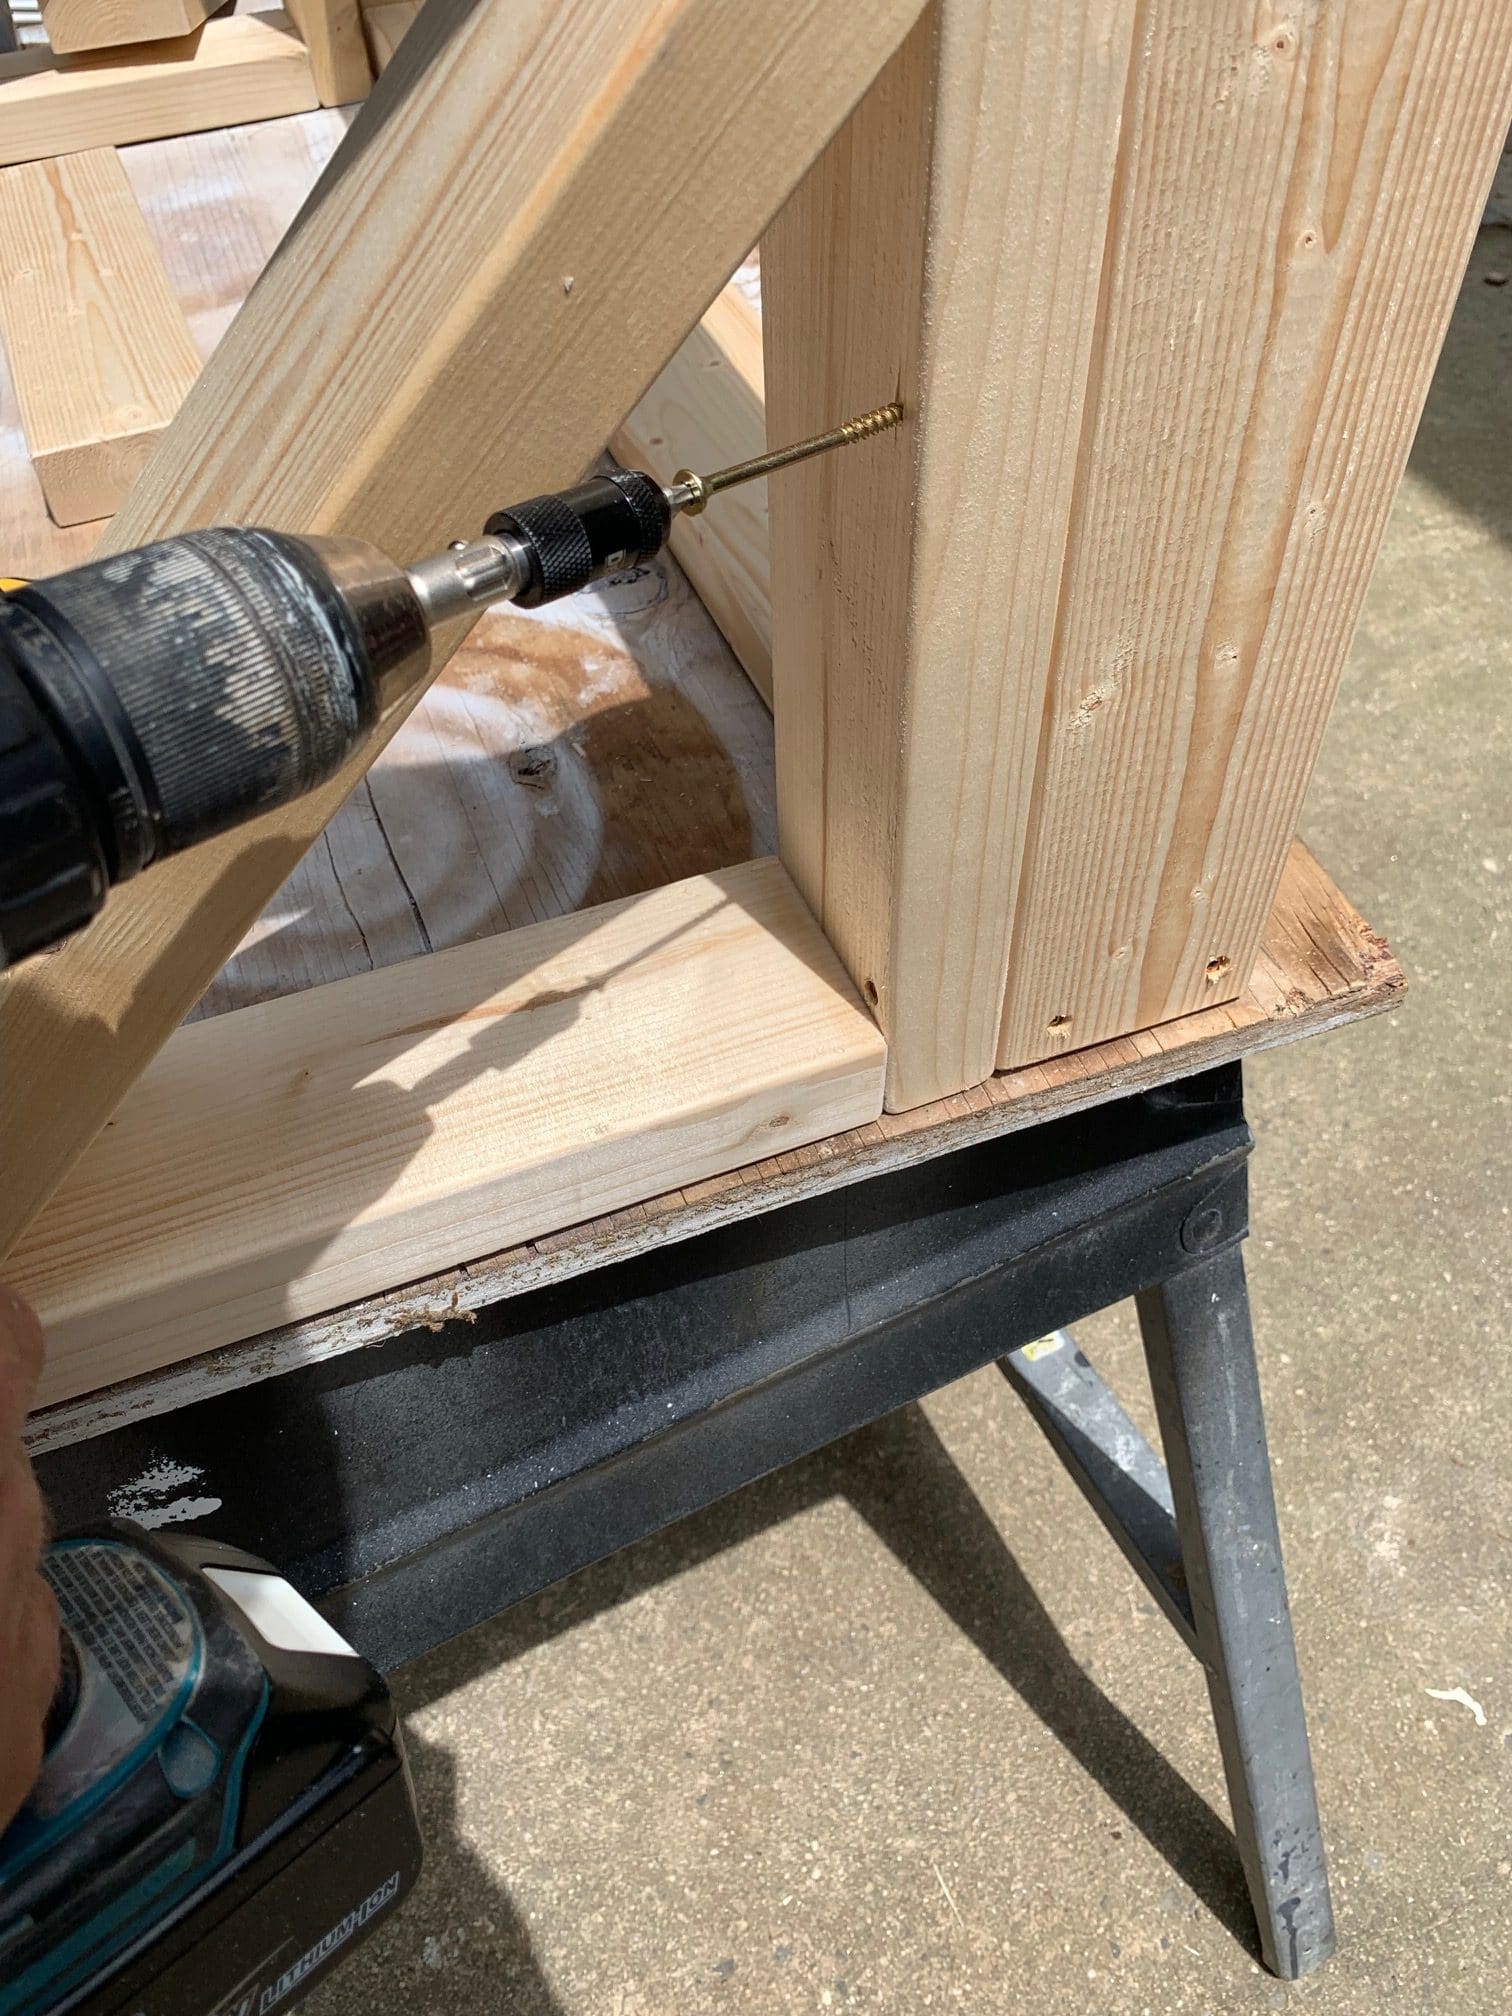
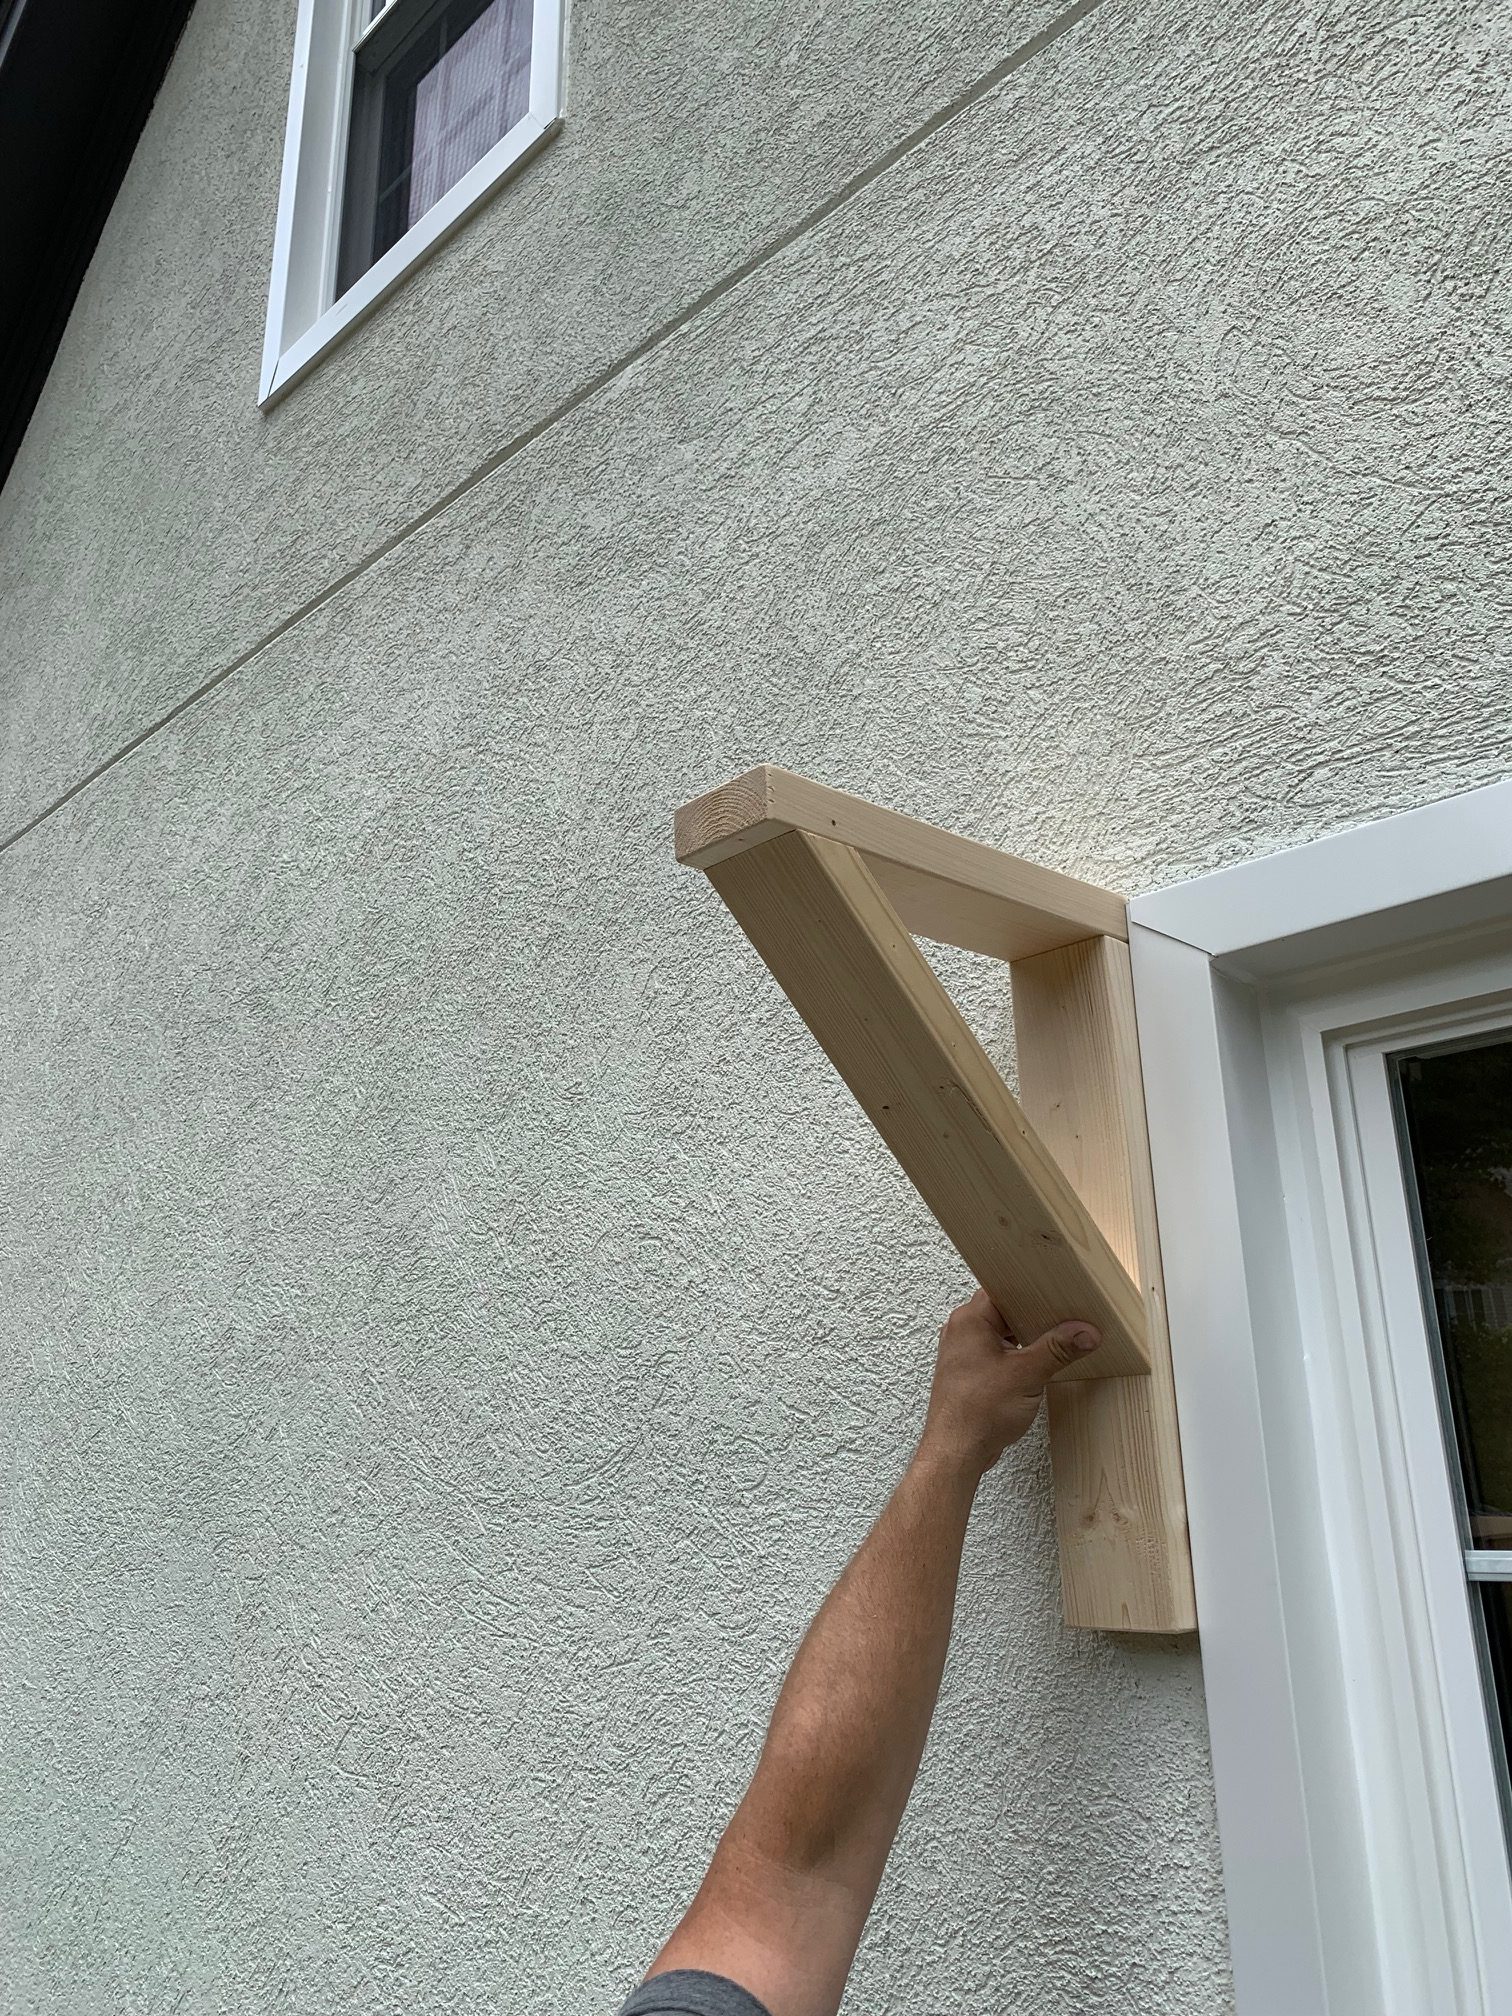
6. The next step will be building the frame of the pergola. This is basically a box that will be mounted on top of your braces. Cut two 2x4s to the length equal to the width determined in step 1 and add 7 inches. This will account for the width of each brace, so when assembled, the edges of the brace and frame are even. I cut the two side 2x4s a little shorter than the brace to give more visual texture to the arbor. Attach the sides, front, and back in the shape of a box, then mount the braces to the bottom.

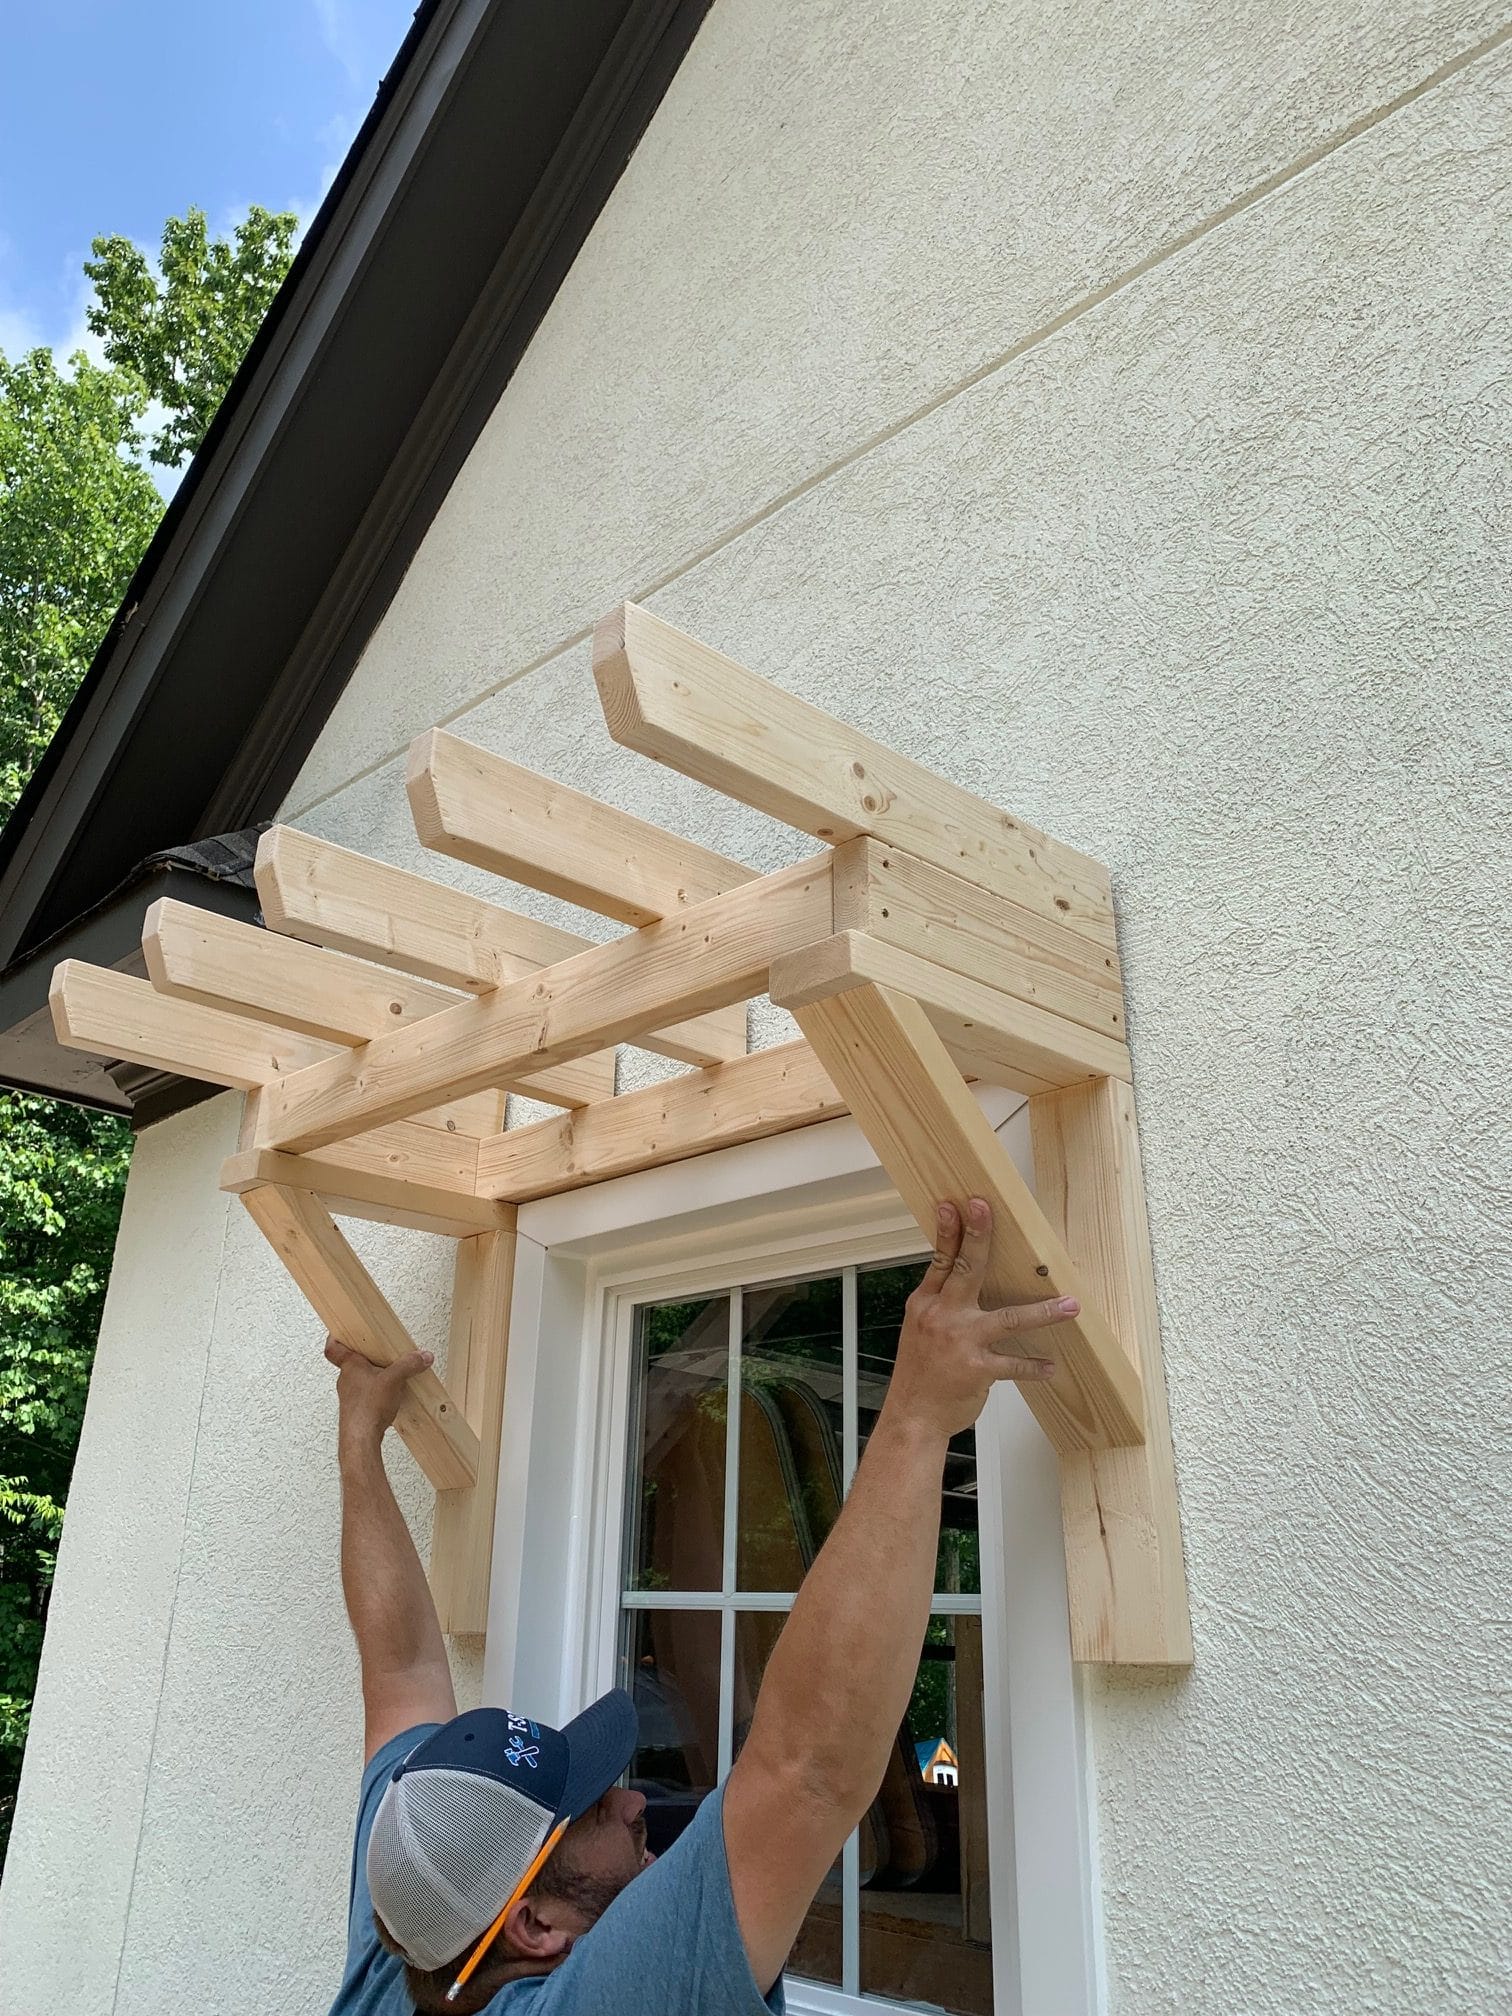
7. At this point, you can dry-fit the pergola over the window. Hold it over the window to ensure proper fit. You’ll need an extra set of hands to either hold the pergola or take pictures for you while you hold it to make sure you like the look.
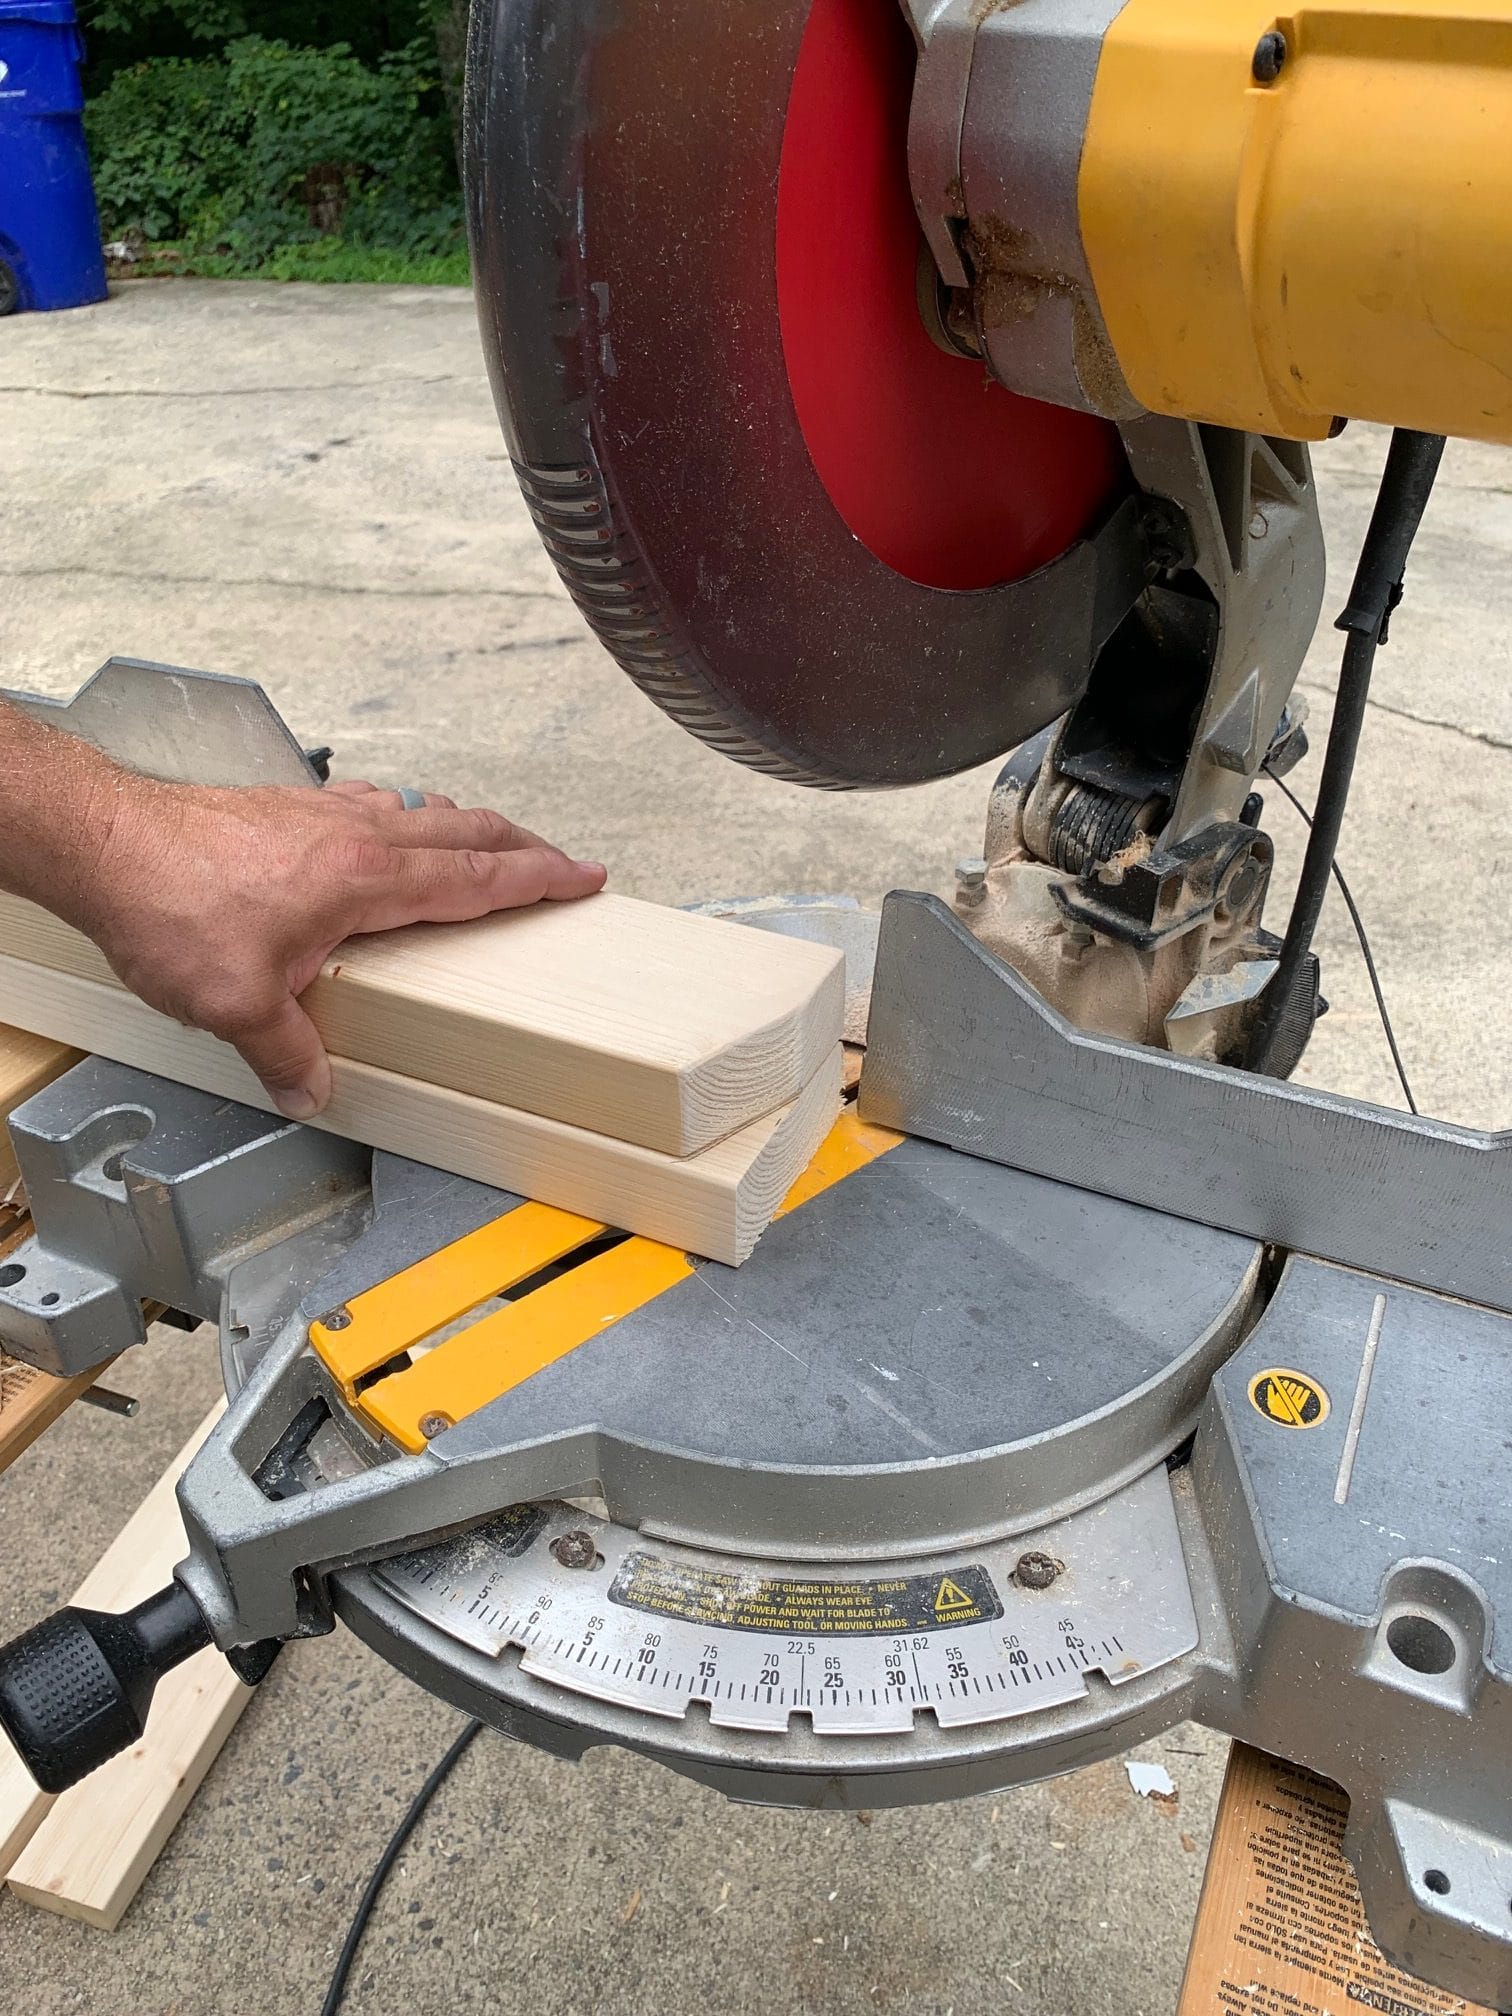
8. Almost done! The last building step is the rafters or beams. These will extend about 10 – 12 inches over the front of the frame. My rafters are 24″. To add visual interest, I used a slight angle cut on the bottom front of the rafter. You can also use a small paint can, trace the edge of the can on the rafter’s bottom, and use a jigsaw to cut. These are decorative cuts and will not compromise the strength of the arbor. Position rafters every 6 – 8 inches and attach by running a deck screw through the back of the rafter and down into the frame. Run additional deck screws through the side of the rafter into the frame.
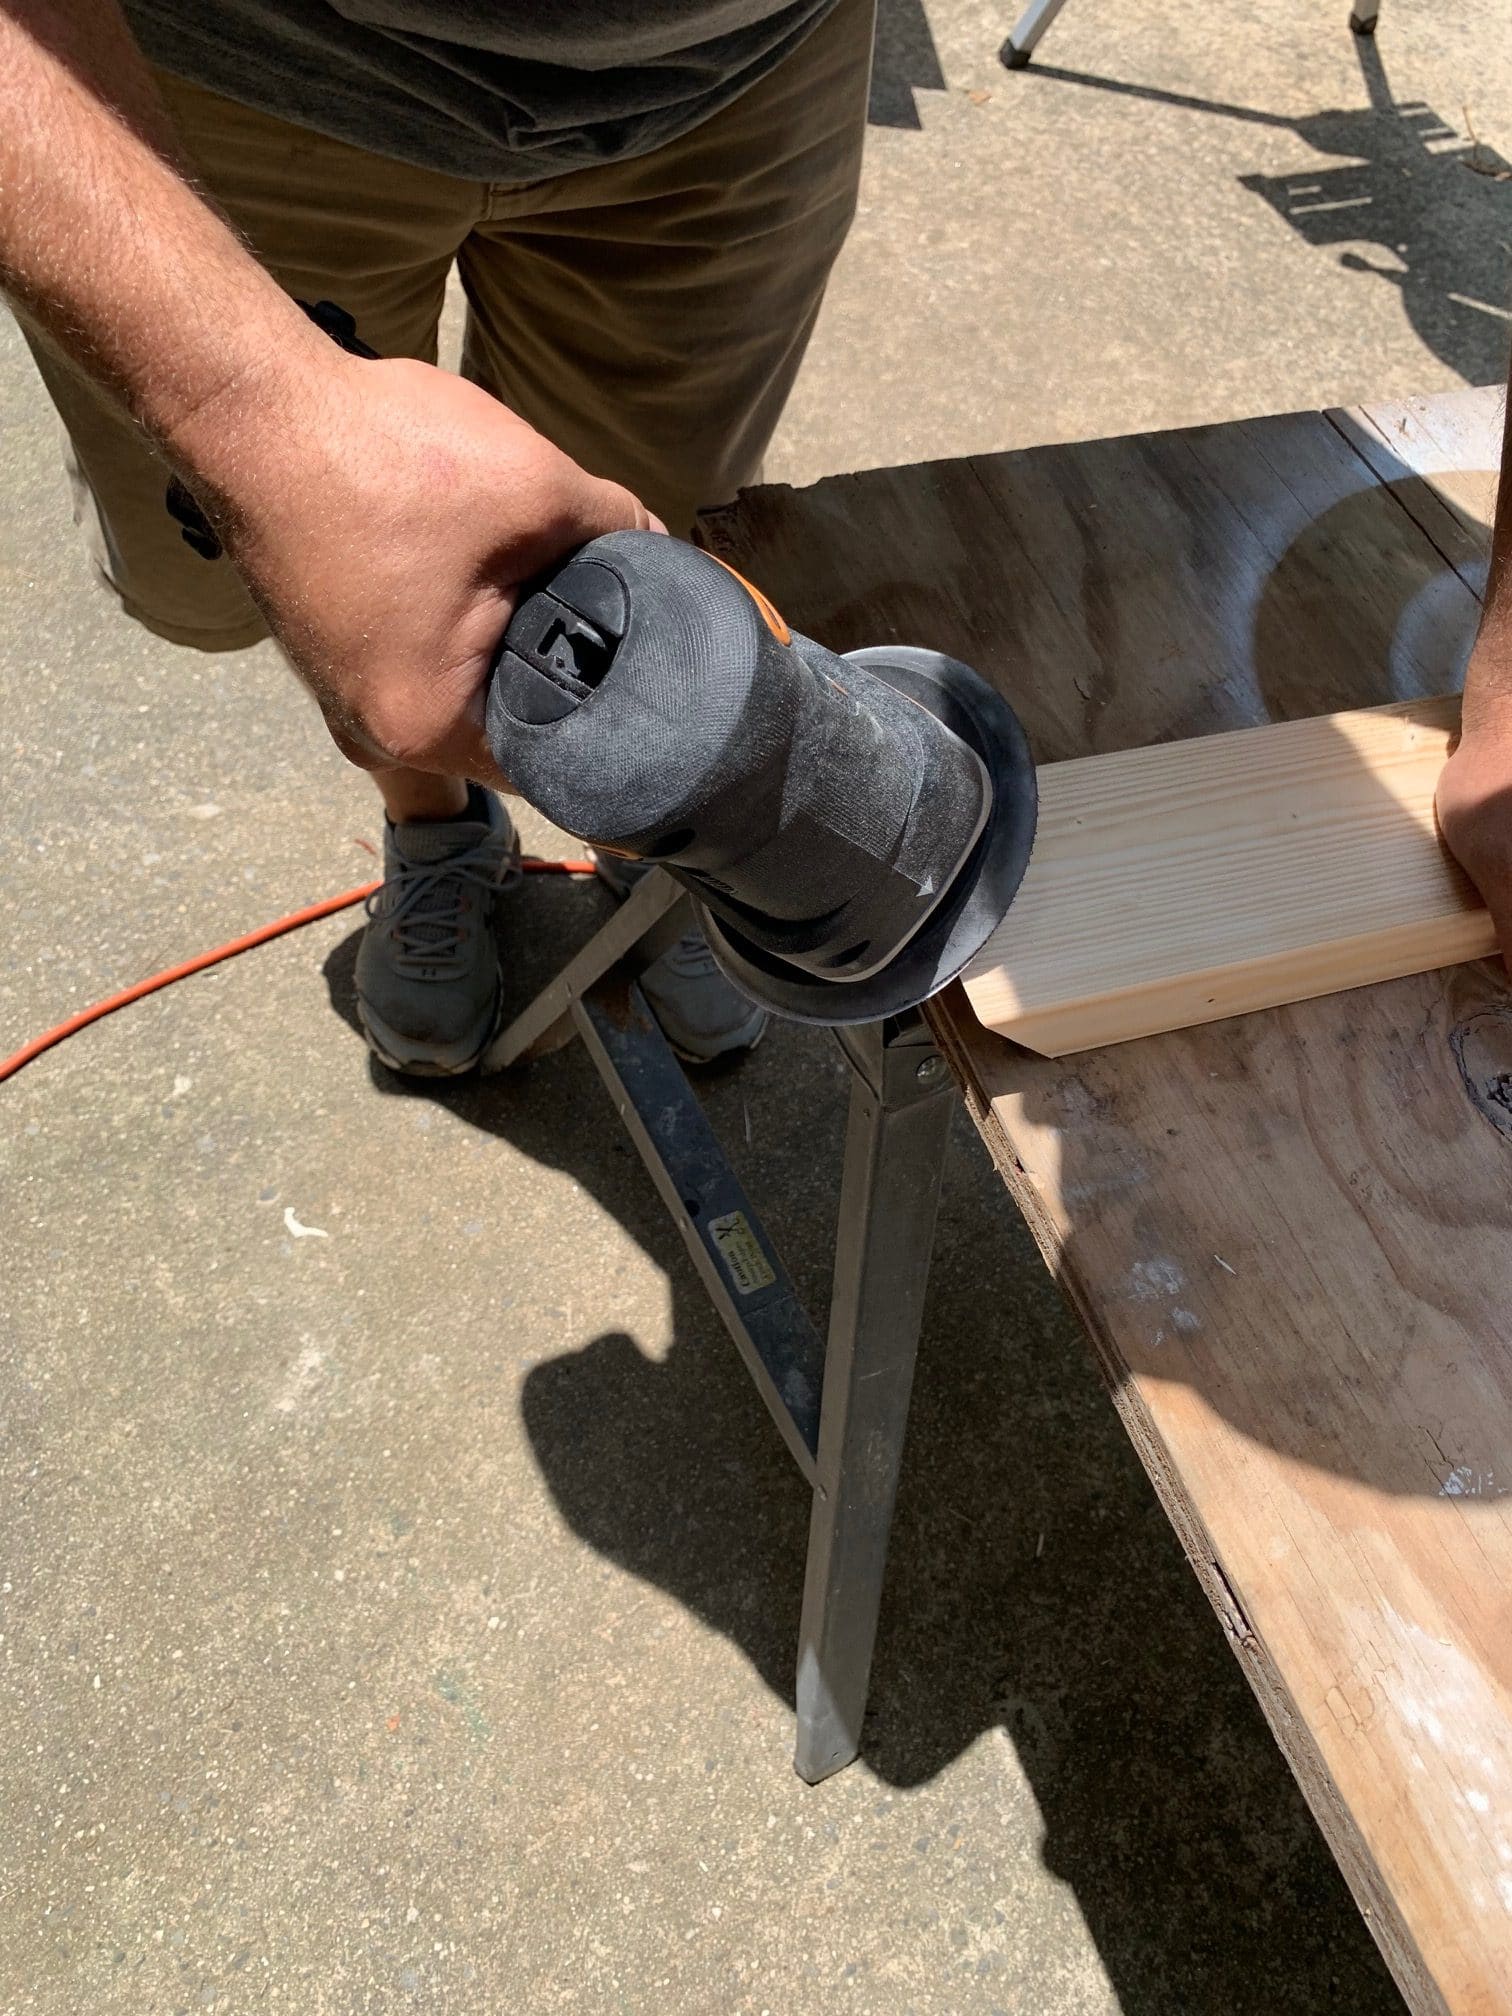
9. Dry-fit the unit before staining or attaching. Use 150 grit sandpaper and sand all rough edges. I used a palm sander to slightly round off the edges of the cut lumber. You can stain and seal the wood before you start the project, then touch up the cut edges at the end if you prefer. Once you are happy with the fit, stain or touch up, seal, and let dry.
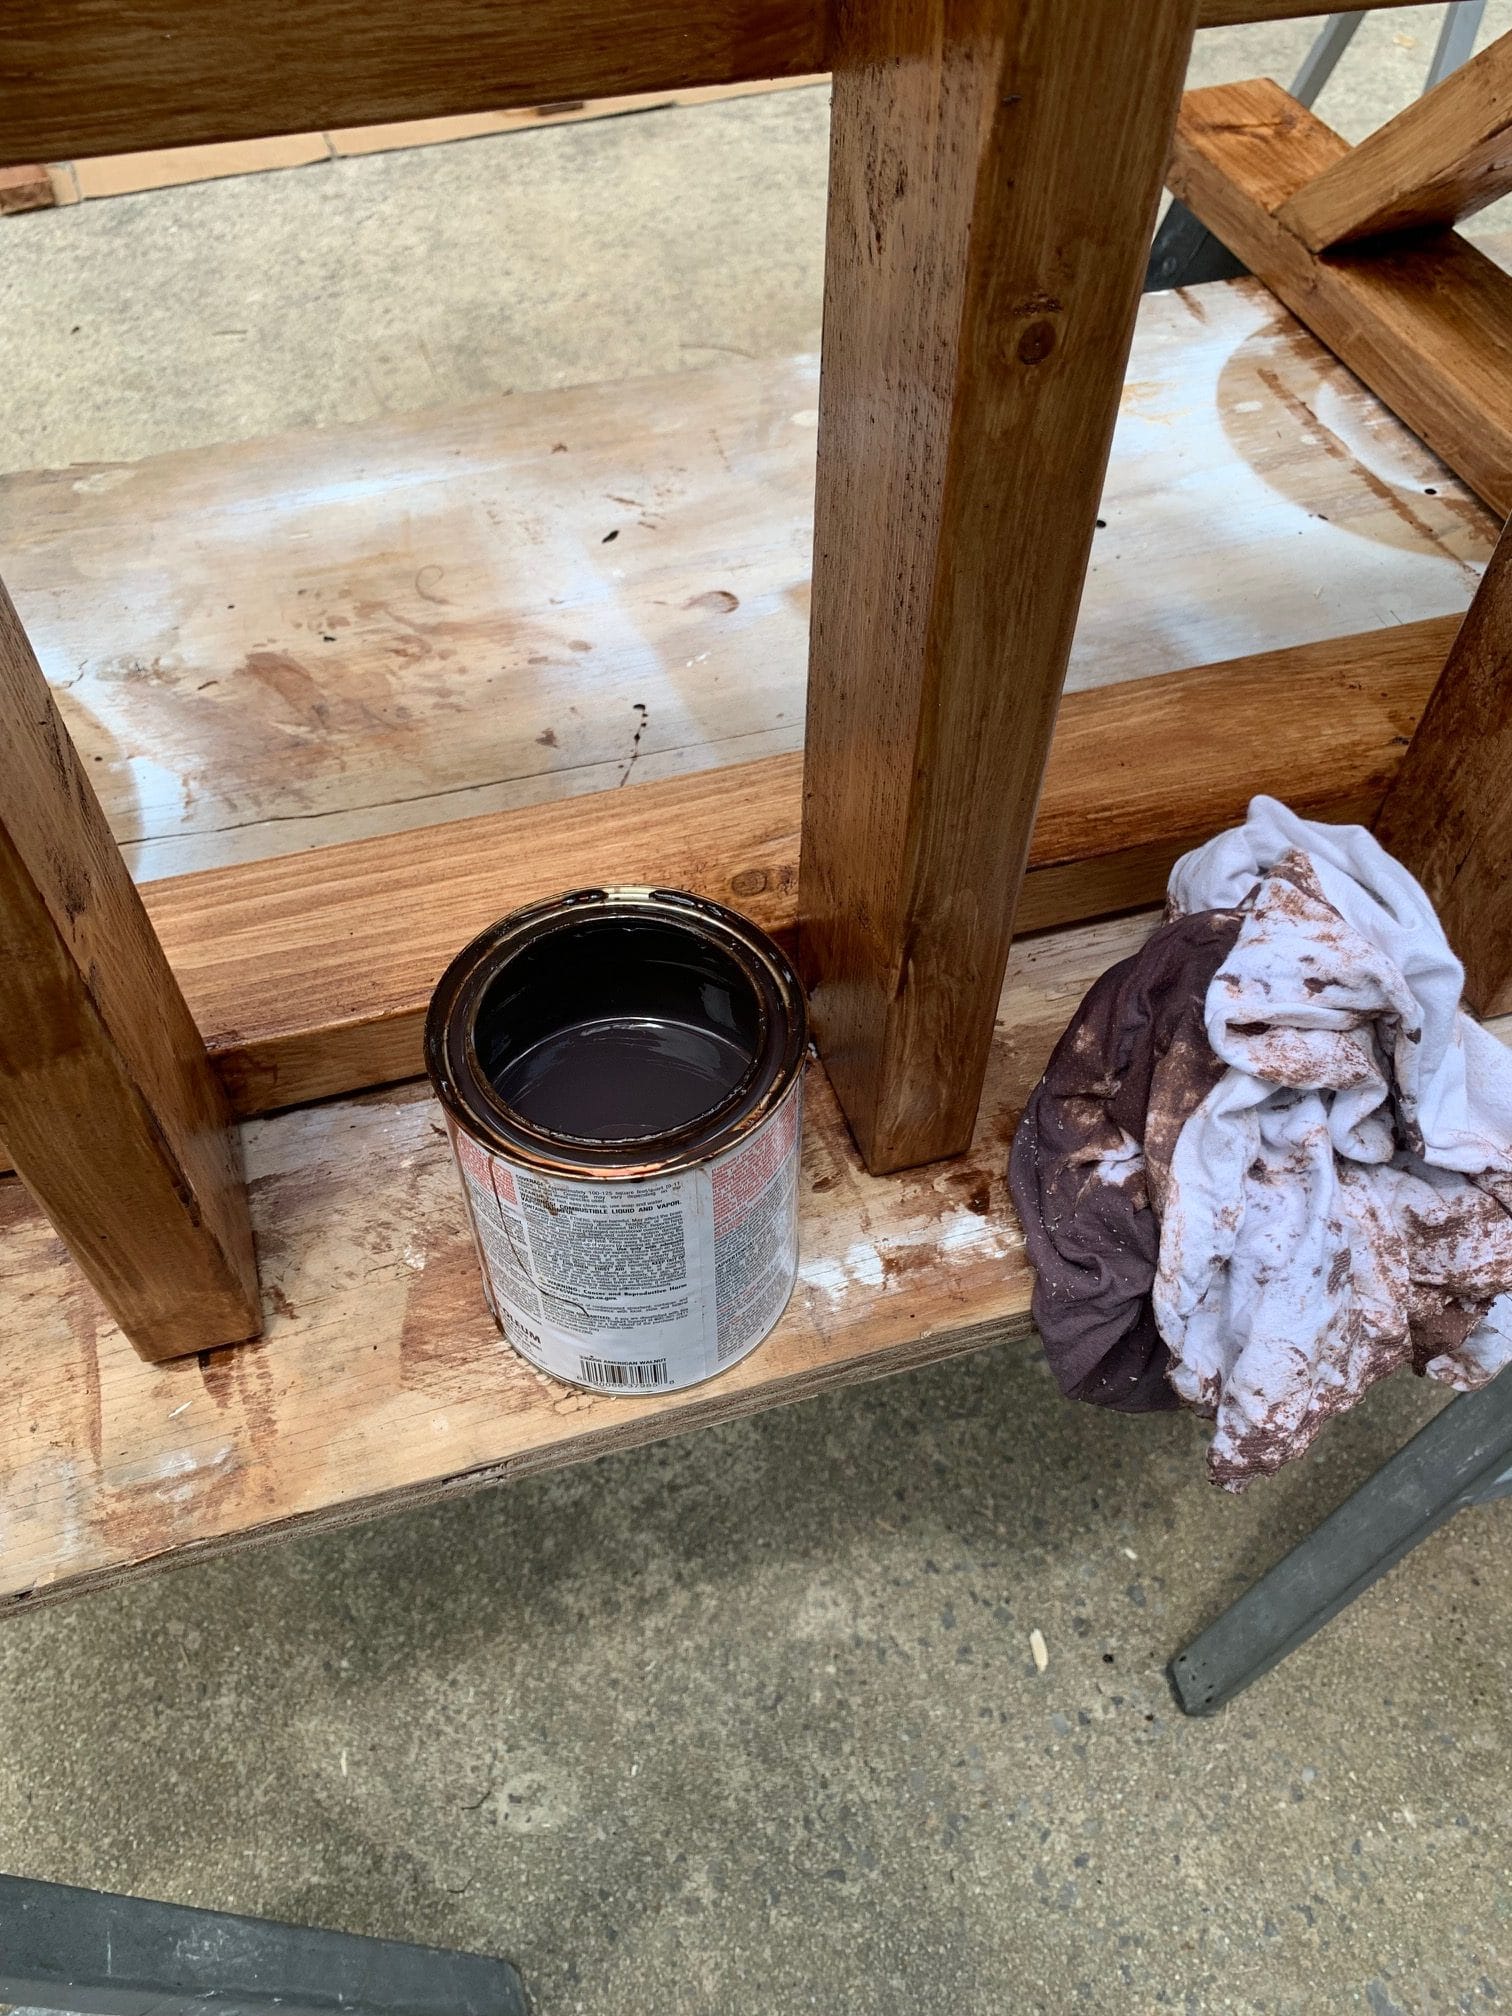
Stain Color –
The trellis sheds were first stained in American Walnut then sealed with a clear polyurethane before installation.
- Step 1: Rust-Olium Stain/Polyurethane – American Walnut
- Step 2 – MiniWax – Clear Polyurethane
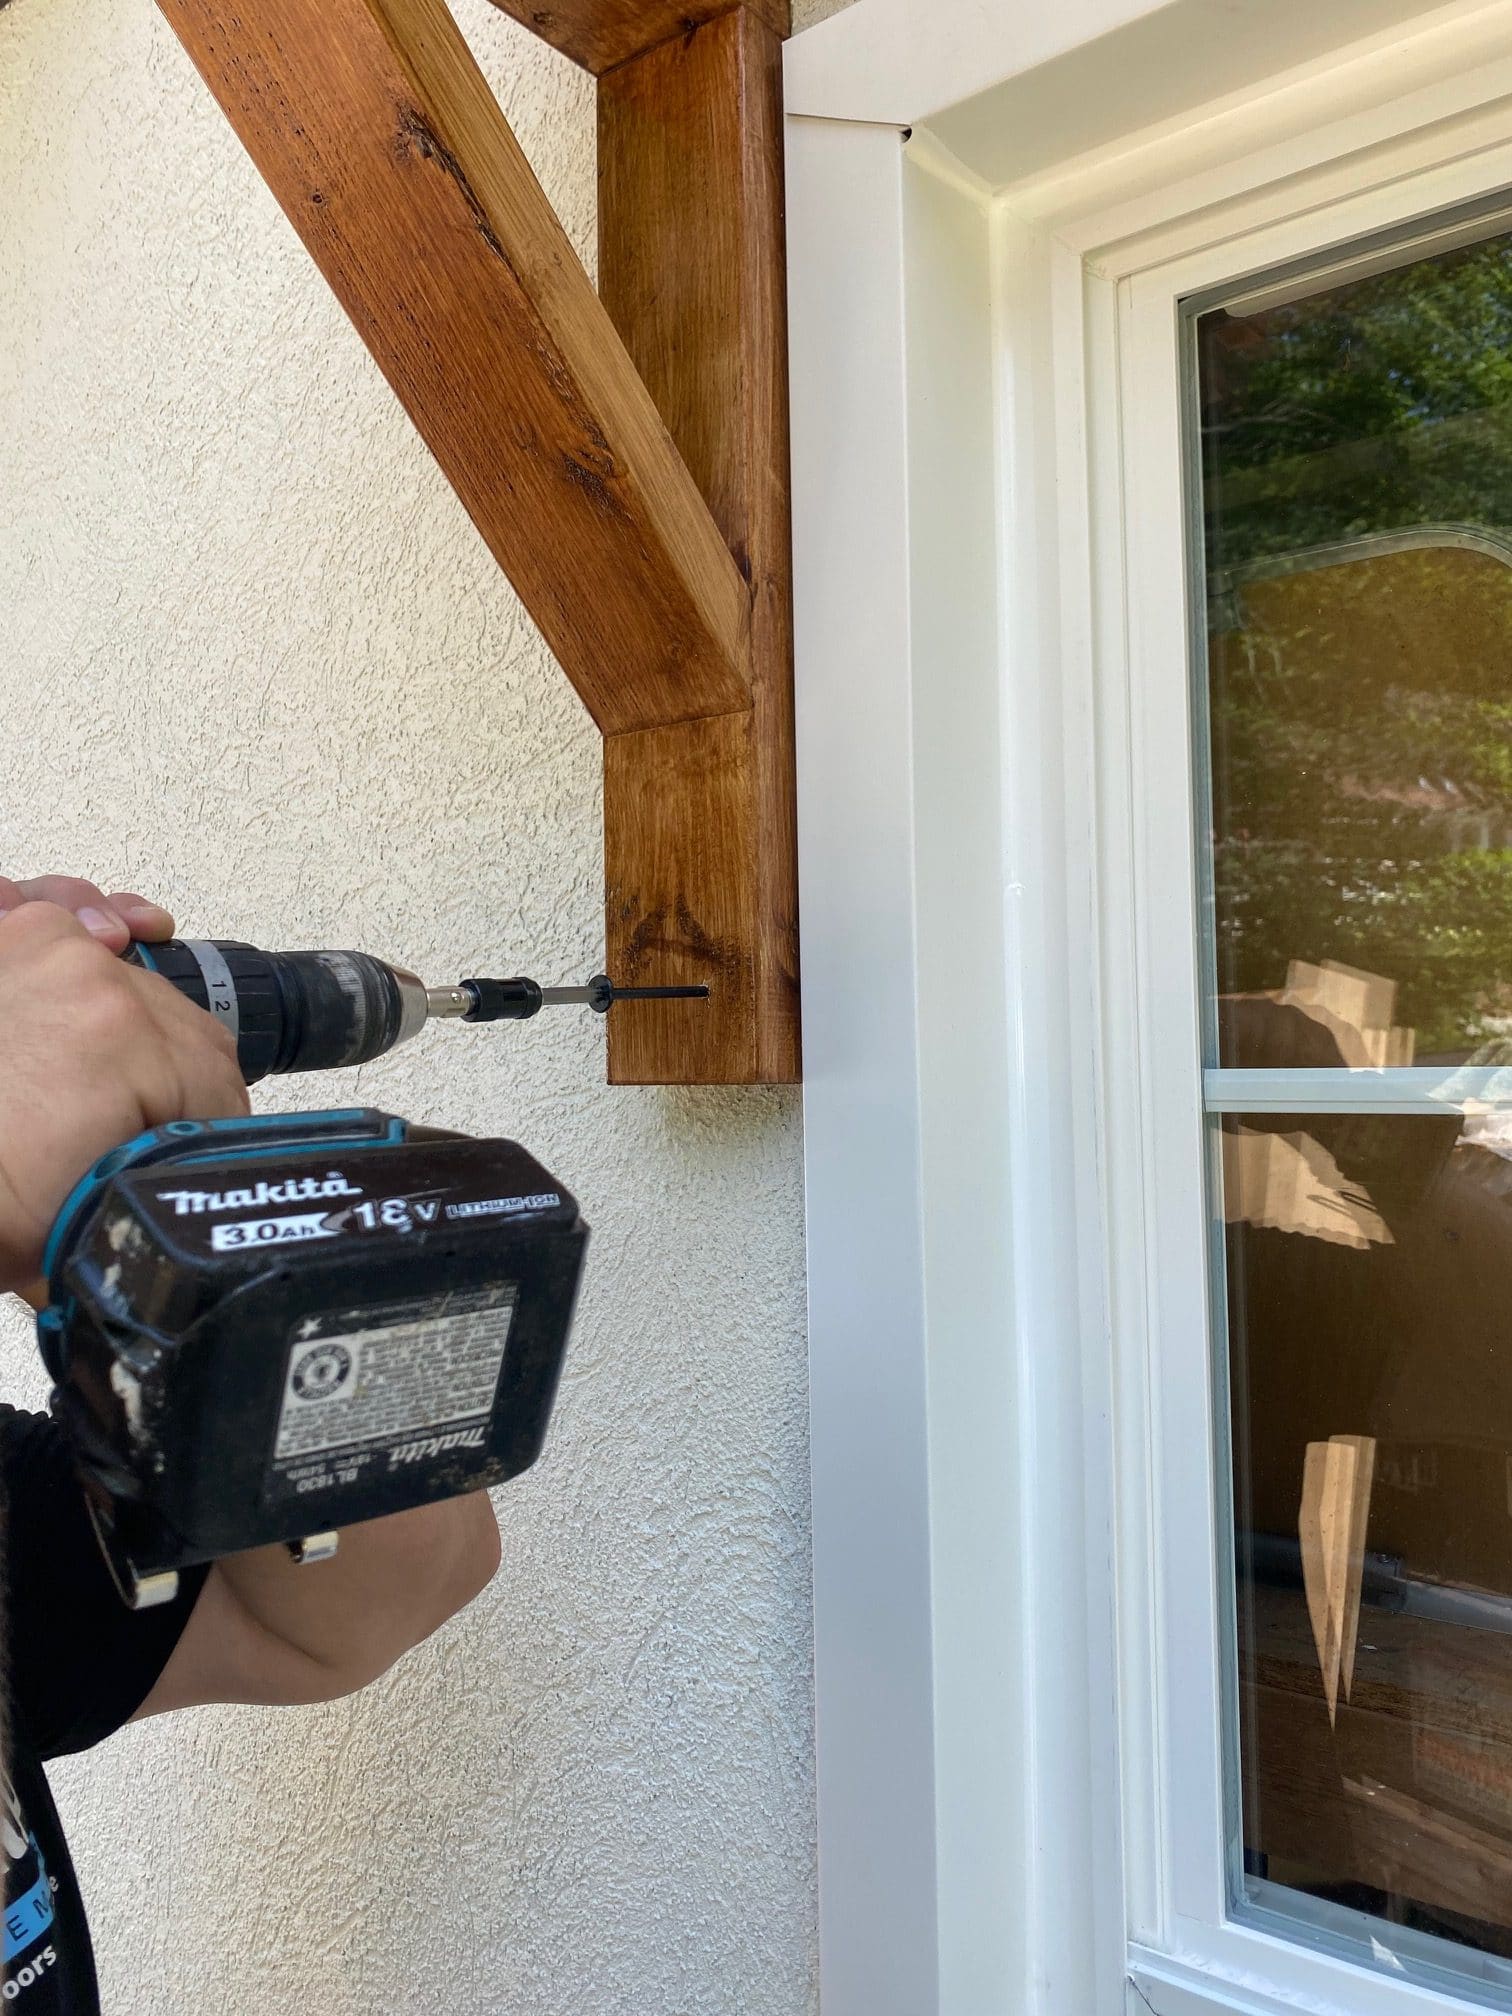
10. You will need an extra set of hands for the last step. Fit the pergola in place and attach with lag bolts. The pergola should be close enough to the window or door that the lag bolts will grab the framing around the window or door. I ran two lag bolts through each brace.
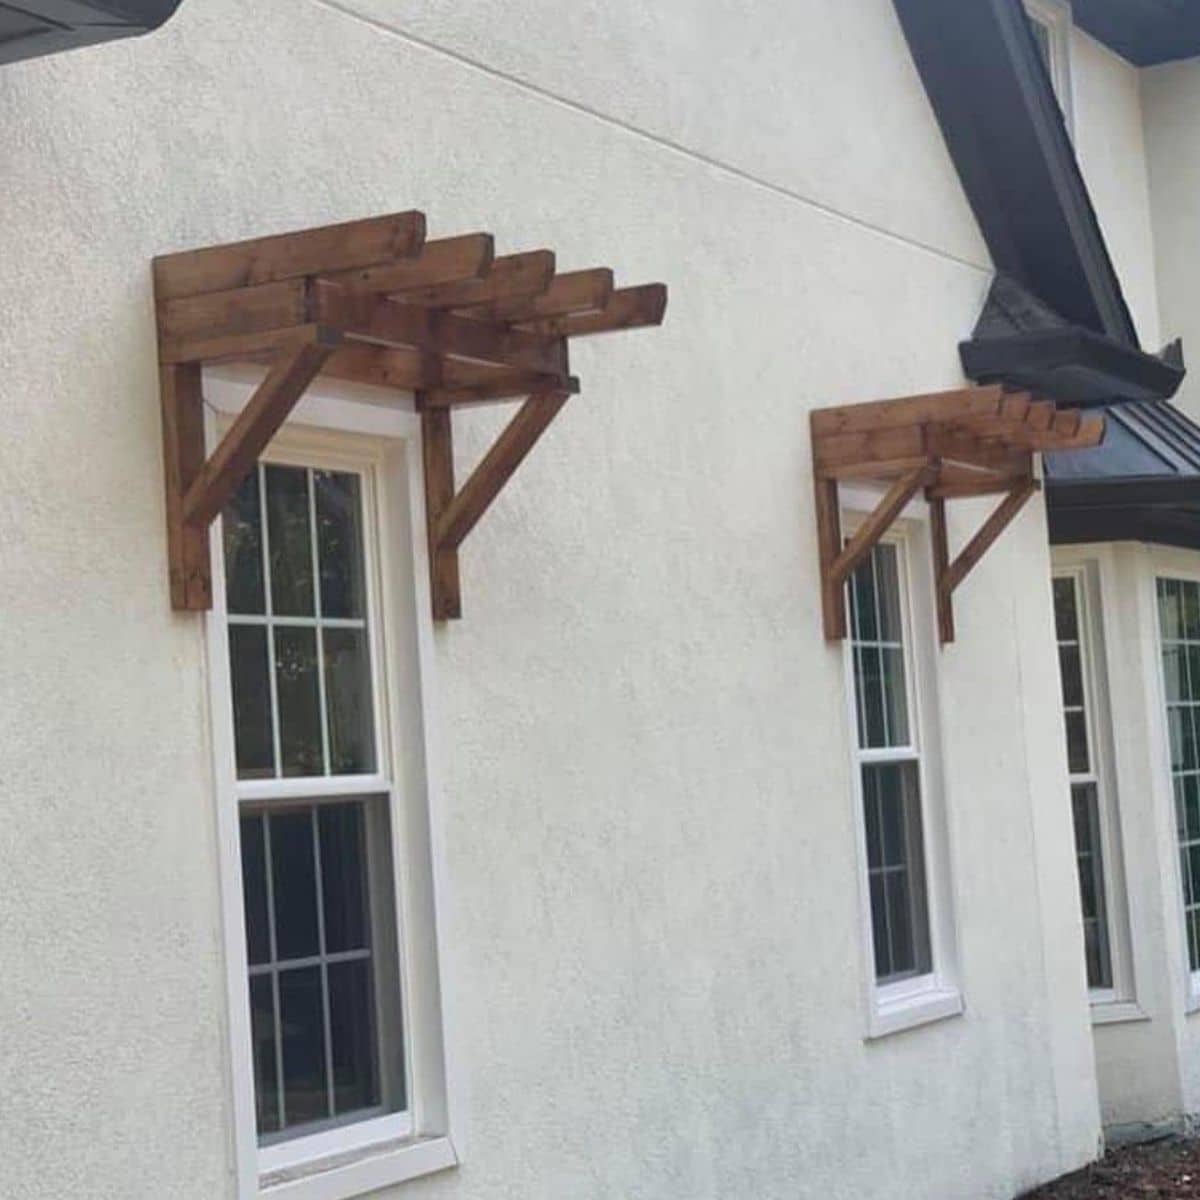
The difference this simple window trellis project made to the overall look of our home exceeded my expectations. The pergola added incredible visual interest and helped modernize the exterior of our home.